I have been making these turkey cookies as a Thanksgiving treat for years. Obviously, bringing a fresh tray of these to an event for kids garners a whole lot of excitement from the little ones. But, I’ve also found that adults look forward to them as well! While working full time (before kiddos), I brought them for my co-workers the week before Thanksgiving one year. I was surprised at the number of requests I got for them every year after that, and it eventually became a little tradition that everyone enjoyed!
We made them again this year, and I’m sharing the step-by-step instructions with you!
Supplies
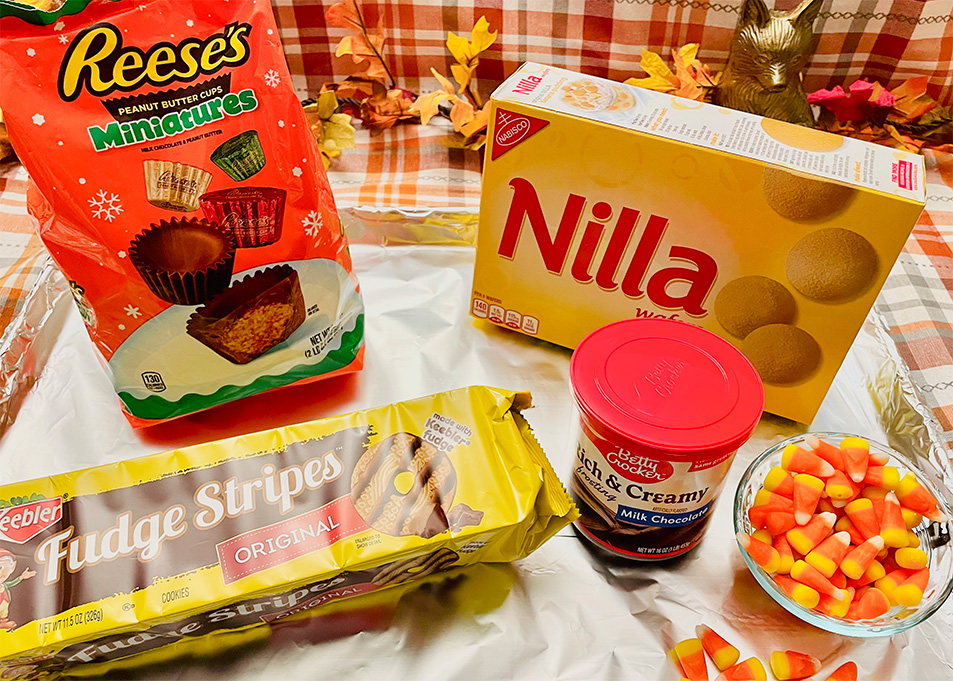
These turkey cookies are very easy to make and are made up of five ready-to-use ingredients:
- Nilla Wafers (or Keebler’s Deluxe Grahams)
- Miniature Reese’s Peanut Butter Cups
- Keebler’s Fudge Stripes Cookies
- Chocolate Frosting
- Candy Corn (or almonds)
Making these turkey treats can get messy with fresh frosting, so I chose to use this Wilton Dessert Decorator Pro tool for making more neat and precise frosting dabs. (This tool also makes frosting cupcakes a breeze, and they turn out looking very professional!)
You’ll also need a sharp knife to cut straight edges off the Keebler’s Fudge Stripes cookies, and a tray to place your finished turkey cookies on to let the frosting harden a bit before serving.
Steps to make 24 Turkey Cookies
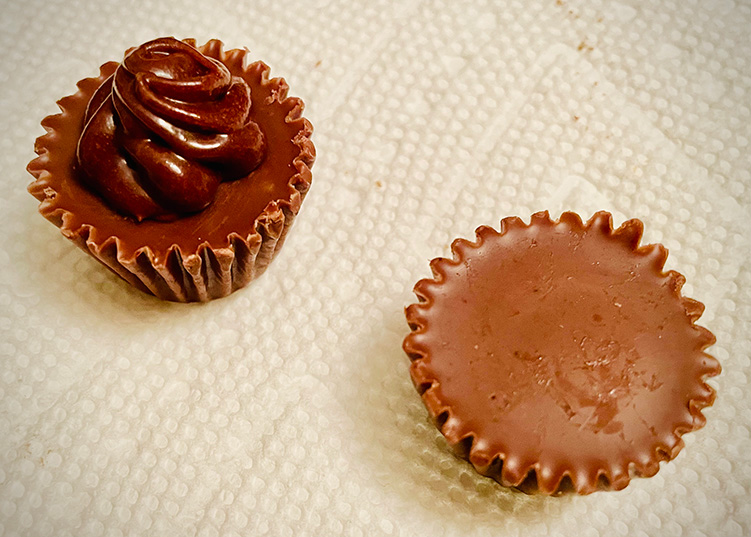
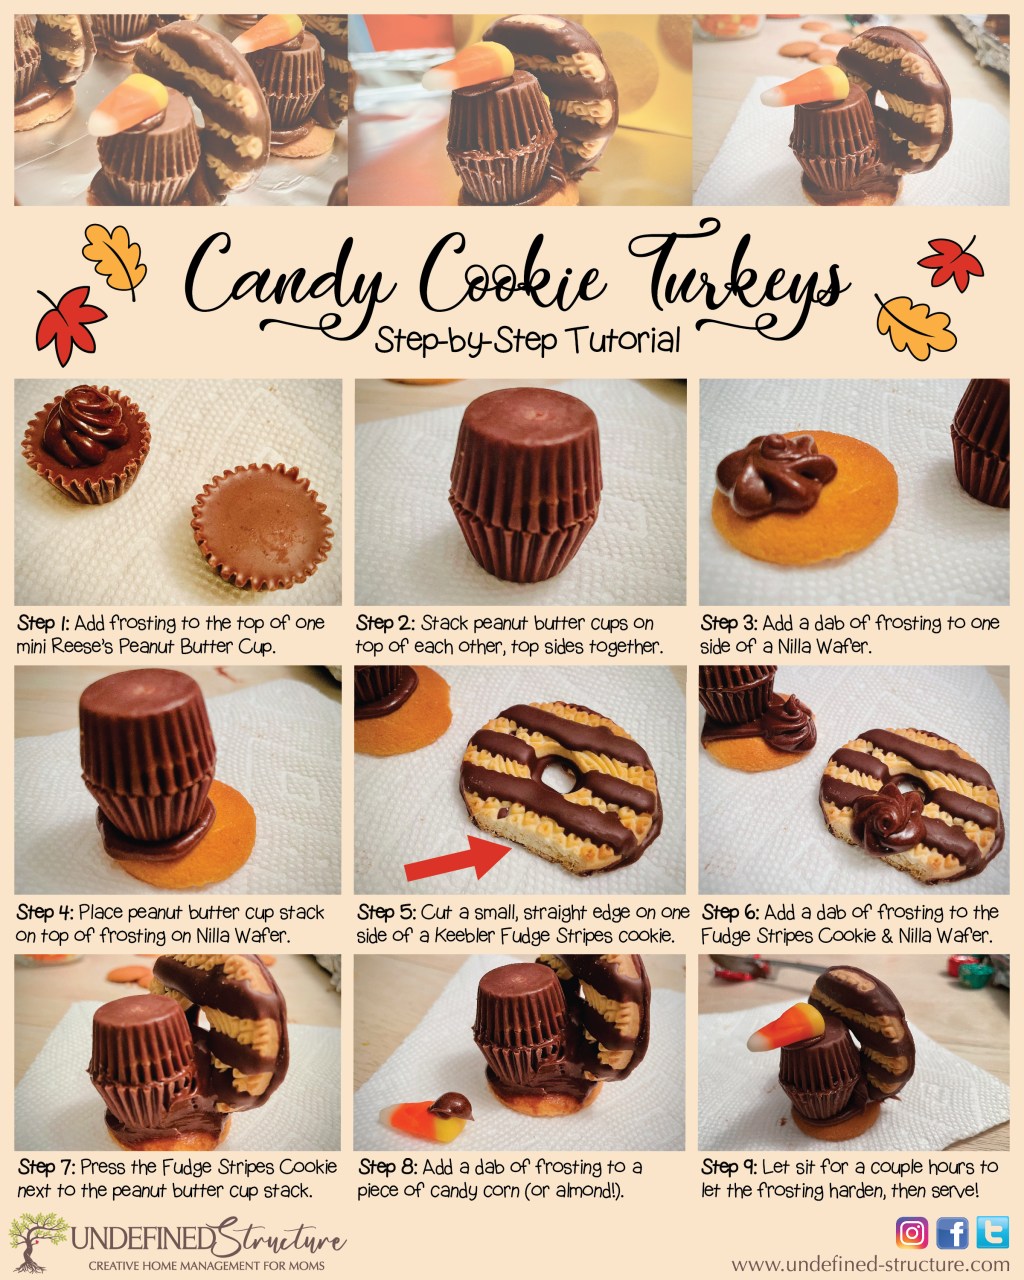
Step 1: Carefully unwrap 48 miniature Reese’s Peanut Butter Cup candies and place in a bowl. I like to recruit my girls to help me with this step! When your peanut butter cups are ready, take two from the bowl, and add a dab of frosting to one of them. Make sure there is enough frosting to hold both pieces of candy together, but not too much that it will ooze out the sides in the next step.
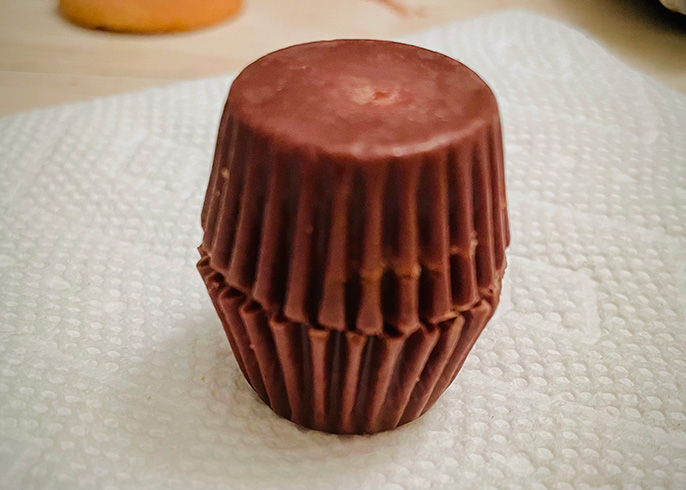
Step 2: Stack the two peanut butter cups on top of each other. They should be stacked top sides together, with the frosting acting as a “glue” to hold them together. This will be the “body” of your “turkey”, and when finished, it should have a nice barrel shape with no frosting oozing out of the middle.

Step 3: The Nilla Wafer (or Deluxe Graham) will become the base of your turkey. Add a dab of frosting to one side of your wafer cookie. Leave a little blank space on the other side of the cookie; that will be where you place the turkey’s tail feathers (the Keebler Fudge Stripes cookie) in a later step.
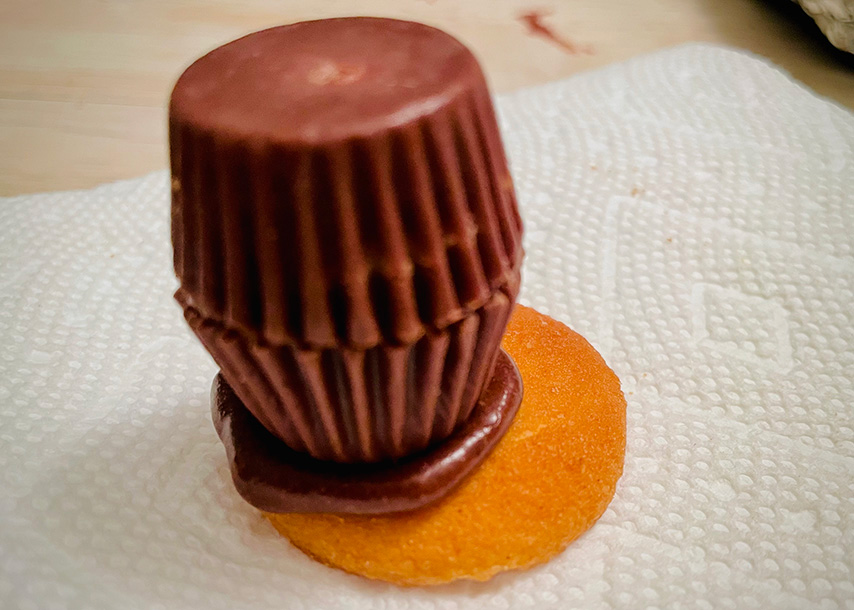
Step 4: Add your Reece’s Peanut Butter Cup barrel, the turkey’s “body”, on top of the frosting you placed on the Nilla Wafer. It’s okay to have a bit oozing out here, you want to be sure your turkey will stay on its base!
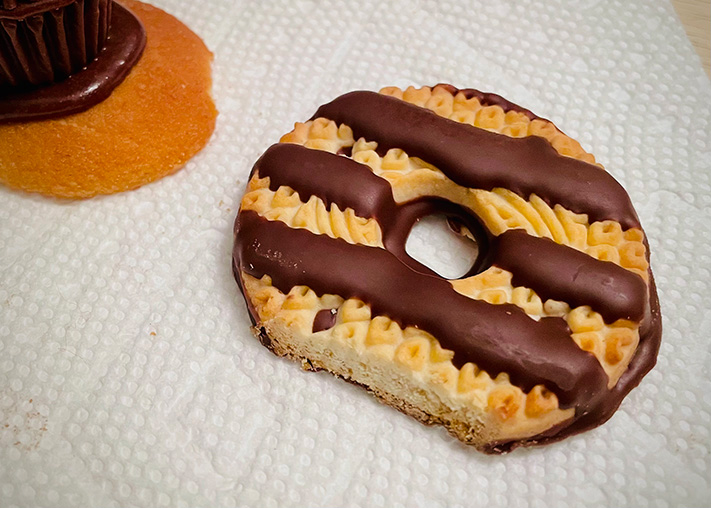
Step 5: Cut a small, straight edge to the bottom of one of your Keebler Fudge Stripes cookies. This cookie will become the turkey’s “tail feathers”, and cutting this tiny bit off will help the cookie stick evenly to your base more easily.
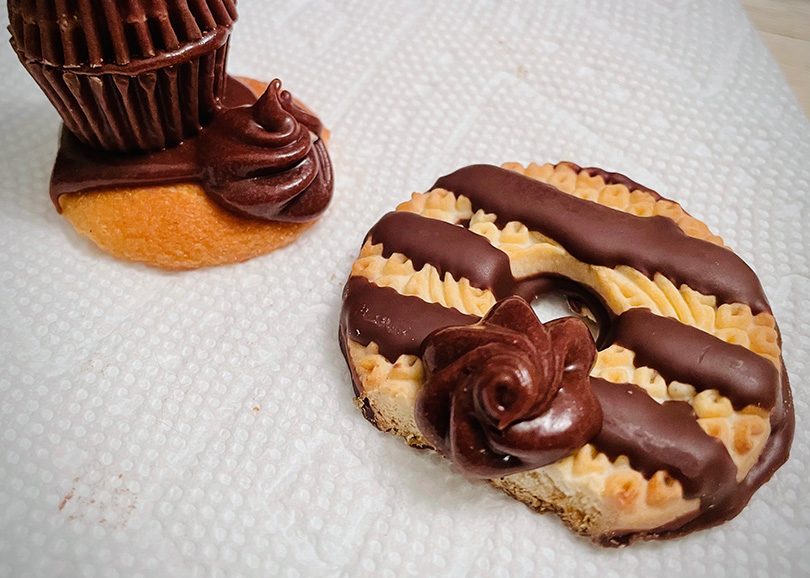
Step 6: Add a dab of frosting to the Fudge Stripes cookie between the center hole and the cut straight edge you made in the step above. Add a second dab of frosting to the Nilla Wafer, right next to your turkey’s peanut butter cup “body”.
Step 7: Here you will attach the turkey’s “feathered tail”. Press the Fudge Stripes cookie up to the peanut butter cup stack, while also pressing it down onto the Nilla wafer. The frosting you added to the Fudge Stripes cookie will hold the tail to the turkey’s body. The frosting on the Nilla Wafer will hold the tail to the base.

Step 8: Add a small dab of frosting to a piece of candy corn (or almond, if you prefer). This will become the turkey’s “head”!
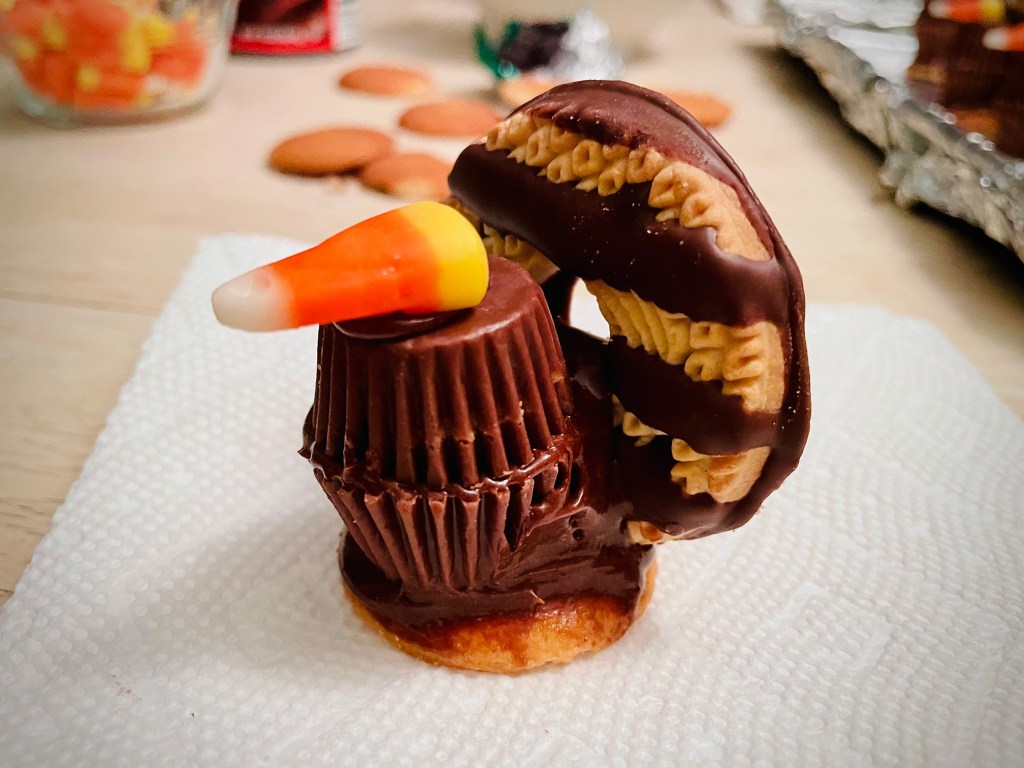
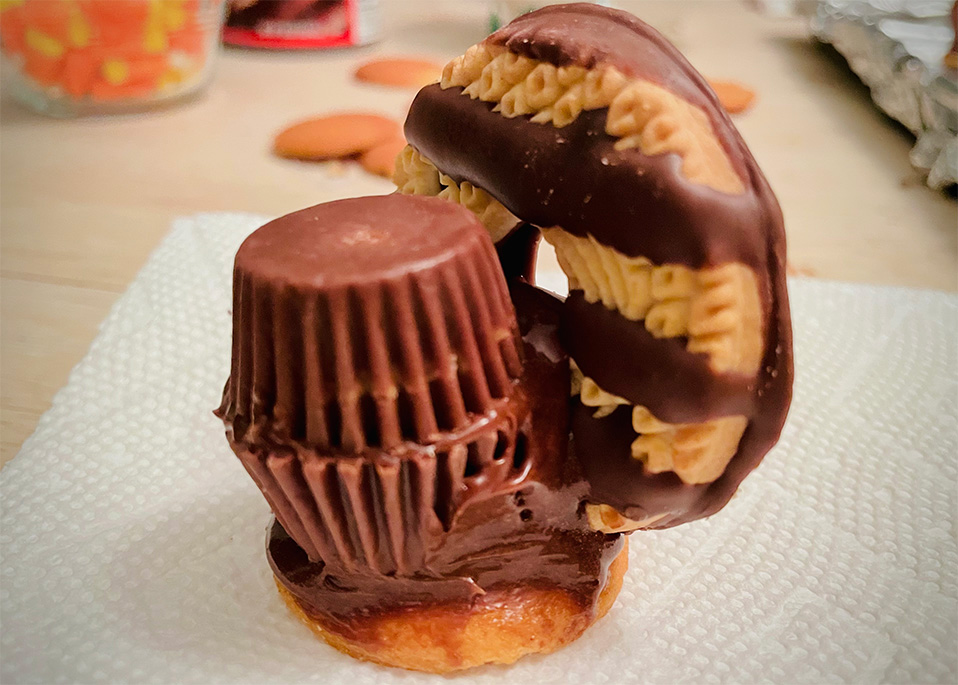
Step 9: Attach the piece of candy corn to the top of the peanut butter cup stack. Your turkey cookie is now complete! When finished with all 24, let them sit for an hour or two (or refrigerate if you need them ready faster). You want the frosting to harden a bit so it holds the pieces firmly together.
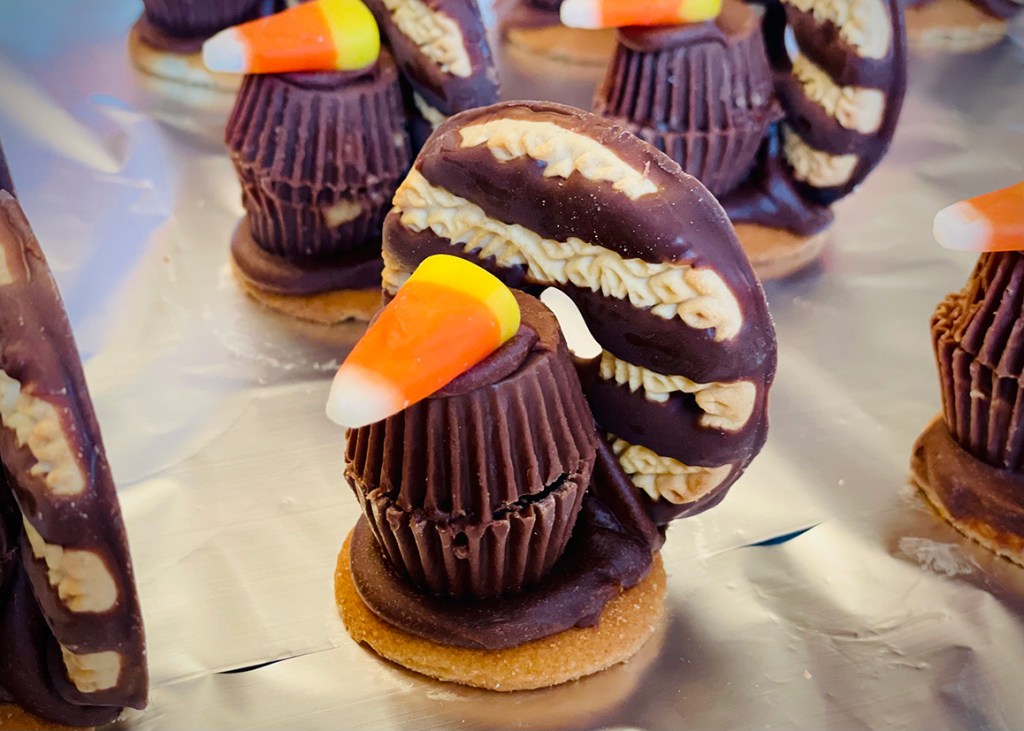
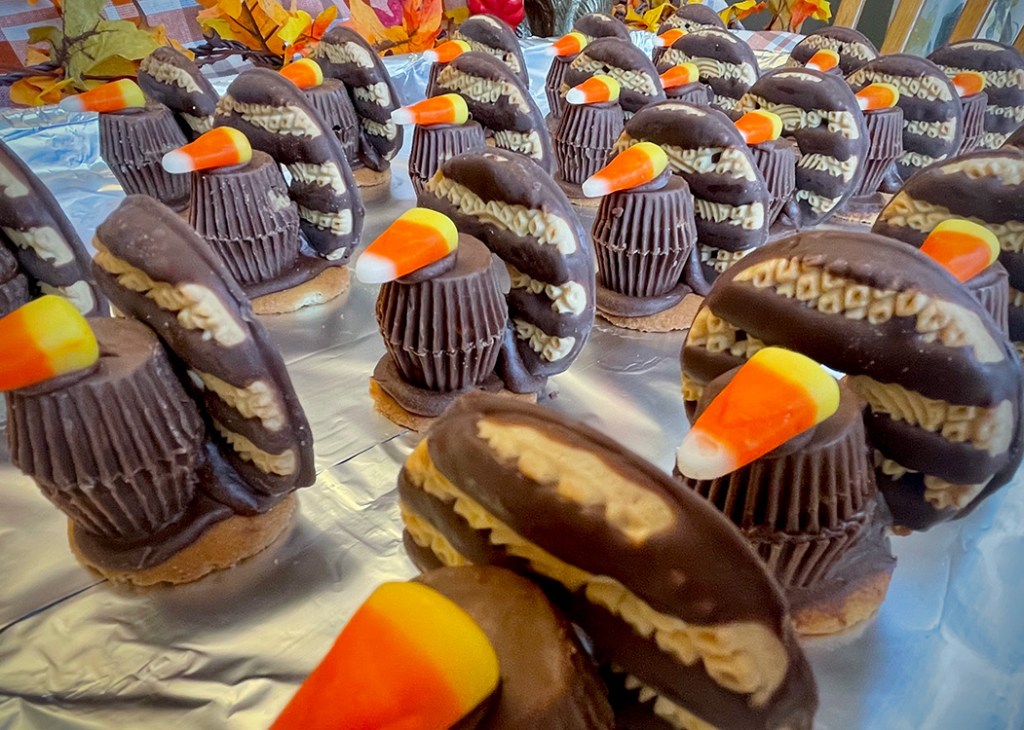
These turkey cookies are so cute and always make for a fun presentation at gatherings with friends and family. It’s a great activity to include your kids in as well, and they will feel proud of themselves when they compete a tray full of these adorable Thanksgiving Gobblers!
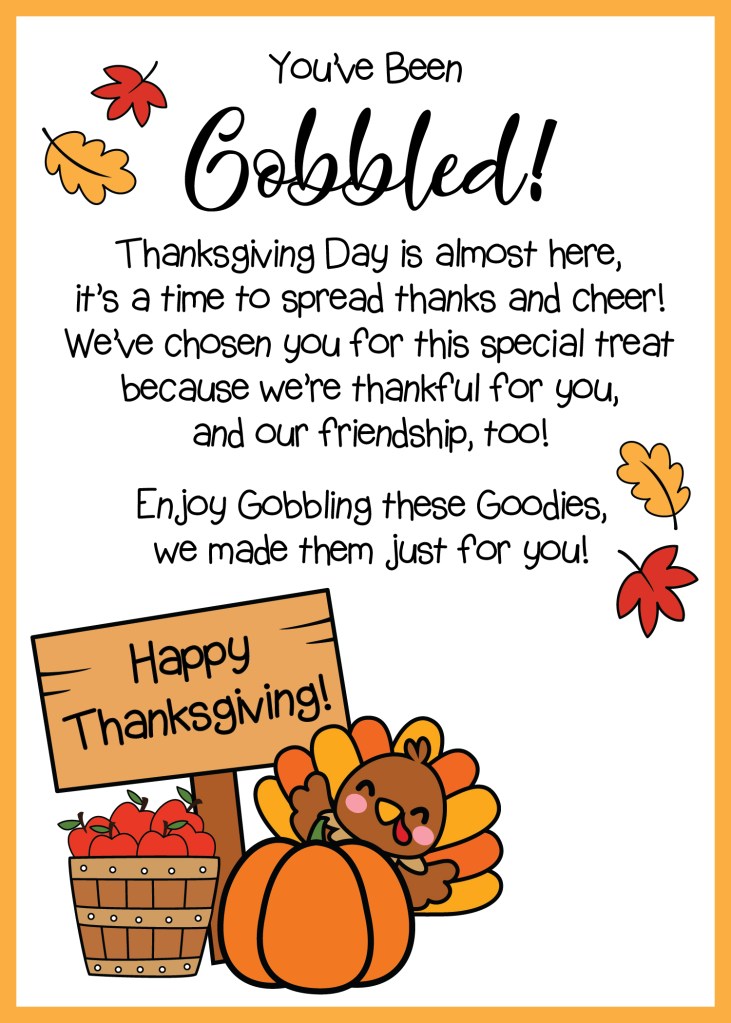
This year, we decided to gift our turkeys to friends with a little card telling how grateful we are for them. I left a little space on the card for the girls to sign their names and write a little personalized note to each friend.
Similar to the Halloween tradition of being “Booed”, our friends were “Gobbled”! Hopefully, these Turkey Cookies brought a smile to the faces of our girls’ friends and their families, and maybe, this will become a new yearly tradition to celebrate how thankful we are for some of the people in our lives that we love so much!
If you would like to leave a “You’ve been Gobbled” surprise for some of your friends and family this year, click here for our free, printable, PDF of the card. We hope you enjoy sharing with friends and family as much as we did! Happy Thanksgiving!
Share your Thanksgiving treats with us in the comments below or on Social Media! Be sure to follow us to stay up-to-date on our most recent projects!

Hi! I’m Jen. When my husband and I welcomed our first daughter in 2013, I left behind full-time employment in marketing graphic design and event planning to become a stay-at-home-mom. These days, I love planning uniquely-themed parties for my girls and adding colorful, unexpected spaces to my home. I also spend a lot of time crafting and gardening and adding flowers to just about everything! I hope you’ll enjoy following along on some of our projects, and sharing some of yours with us on social media!
