I am SO excited to share this party! Planning my girls’ birthday parties each year is one of my favorite things. This one was extra special because it was the first birthday party my youngest would celebrate with her friends; we’ve spent the last two years with very limited guest lists due to the pandemic. Now that we’re able to invite friends into our home again, this party just HAD to be epic!
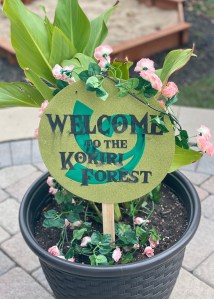
My daughter recently discovered the Legend of Zelda video games, and she instantly fell in love with the idea of choosing this theme for her birthday party. The game’s artwork is beautiful and forest themes and woodland characters can be found throughout, allowing me to use party decor similar to what you might find at a fairy or garden-themed party. Of course, the Legend of Zelda games are also full of adventure, and it seemed perfect to add a quest (scavenger hunt) activity for the kids, to tie it all together.
My party decor usually breaks down into a four-part formula:
- A birthday invitation that announces the theme to our guests (I usually design my own)
- A “feature table” (our kitchen island)
- Decorations created via my Cricut machine (birthday banners, etc.)
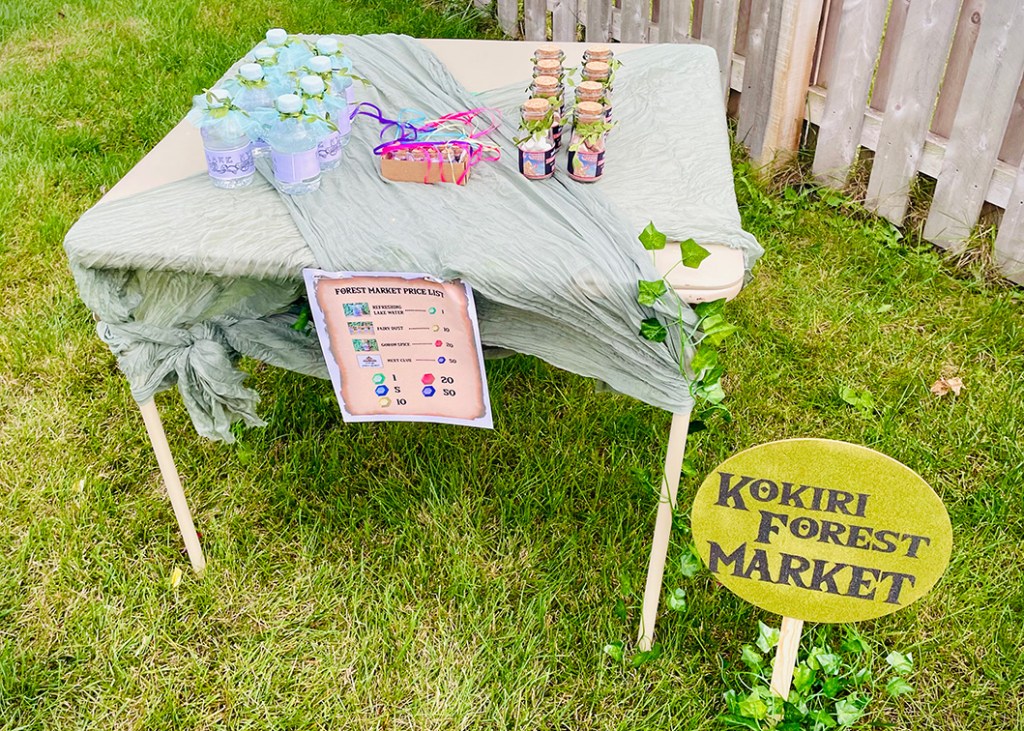
- Theme-specific decor for tables, the gift area (usually our front window), and in this case, the Quest! (I’ll be doing a separate blog post to show details for the quest part of the party and will link it here.)
Birthday Invitation
I always start with the birthday invite. While it may seem trivial, it immediately gives you a clear purpose in your planning strategy! Colors, themes, characters, and even font style tie your entire party together and help guide many of your decisions in the planning process. Not only that, the invite makes your party more memorable, and instantly connects each guest to your event and to the other guests you’ve invited.

Taking design inspiration from the game’s logo, I created a logo of my own for the party invitation using “The Wild Breath of Zelda” and “Triforce” fonts (both are free for download on www.dafont.com). The logo, invite imagery, and fonts carried over onto all other aspects of this party including the birthday banner, decorations, and quest items! (Background artwork on the invite is by tomgardenart.com.)
Once the invitation was complete, I could move on to planning the decorations. First I planned a feature table to greet guests as they entered my home. Usually, I make this my kitchen island because the kitchen is where everyone seems to head to first! Not only that, it’s where people tend to gather, especially when food and desserts are served!
Feature Table
In addition to being a focal point for the party, putting up a table like this is a fun surprise for my daughters on the morning of their birthdays before the guests arrive. There’s nothing like seeing the excitement on their faces for their special day, especially if I include stuffies or other toys to match their chosen theme.
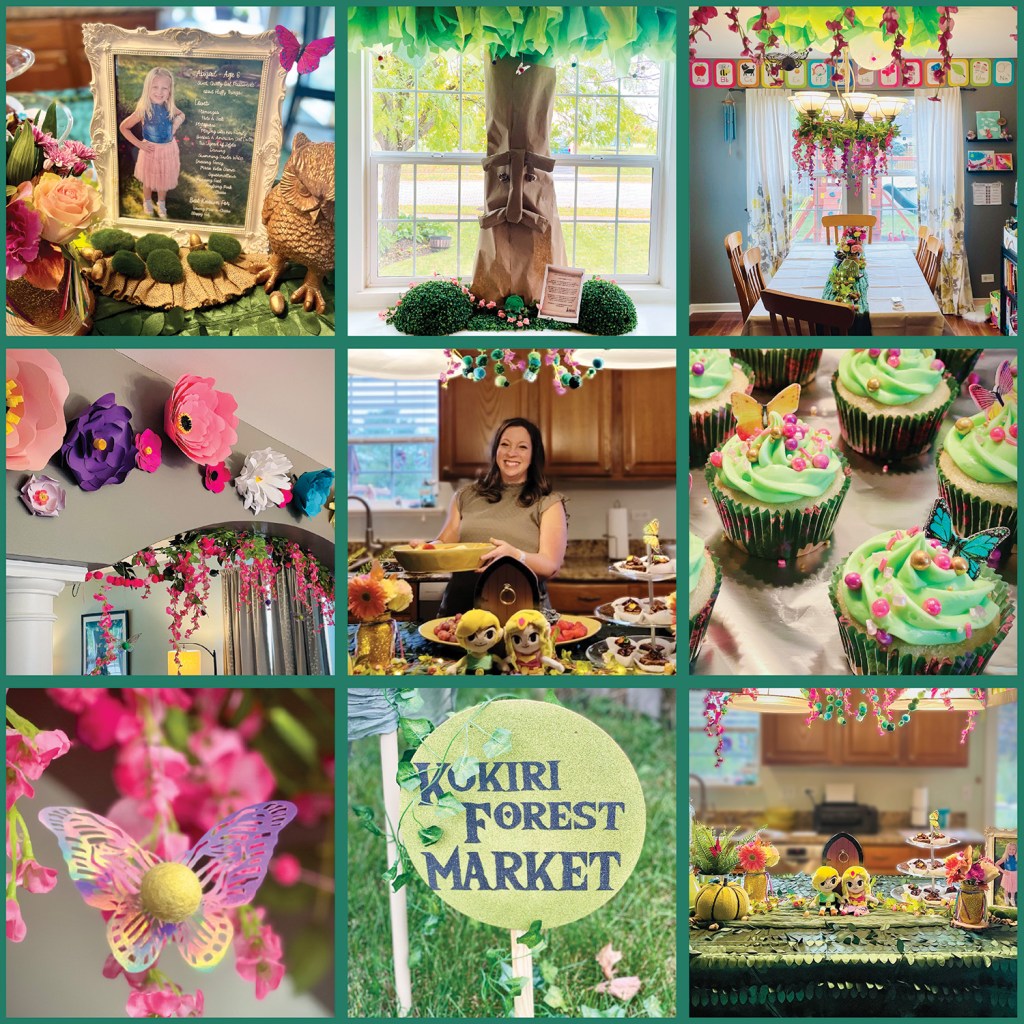
Every year, I also include a personalized photo infographic of the birthday girl to showcase all the special things we love about her! It’s something our guests (especially grandparents!) look forward to, and it’s fun to see how the details change year-to-year. After the party is over, I leave the photo out on display!

For this table, I included Zelda and Link stuffies sitting in front of a flowery fairy light garland. The fairy door, felted pumpkin, and glittery gold owl were from Target’s Halloween dollar spot, and matched with the Zelda forest theme! I made the gold glitter mason jar flower vases for another party, but they fit in here filled with fresh flowers from our local Jewel supermarket. My favorite find for this table was the green leaf petal table cloth. With its gauzy texture and deep green color, it set the stage for this table perfectly!
For vertical interest, I decorated the kitchen light fixture above the island. To keep with the forest theme, I used balloons and some green tissue paper to give the feel of being under a canopy of trees. Command strip hooks, attached to the ceiling, hold floating fairies and “stained-glass” forest temple windows that both my girls helped me to make! The light fixture itself is decorated with wisteria silk flowers and a green pompom garland my daughter crafted on her own a couple years ago. We save and re-use as many decorations as we can for our parties!
Cricut Decorations
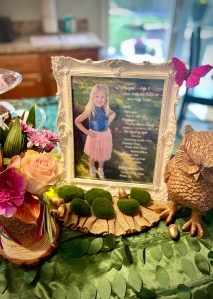
In addition to a feature table, no party would be complete without a “Happy Birthday” banner. A Cricut machine allows you to bring any kind of themed banner to life with a little custom artwork and a glue stick! The same font I used in the invitation became the letters, and I drew out and uploaded the other Zelda shapes to create the shield, heart, and triangle symbol in Cricut Design Space.
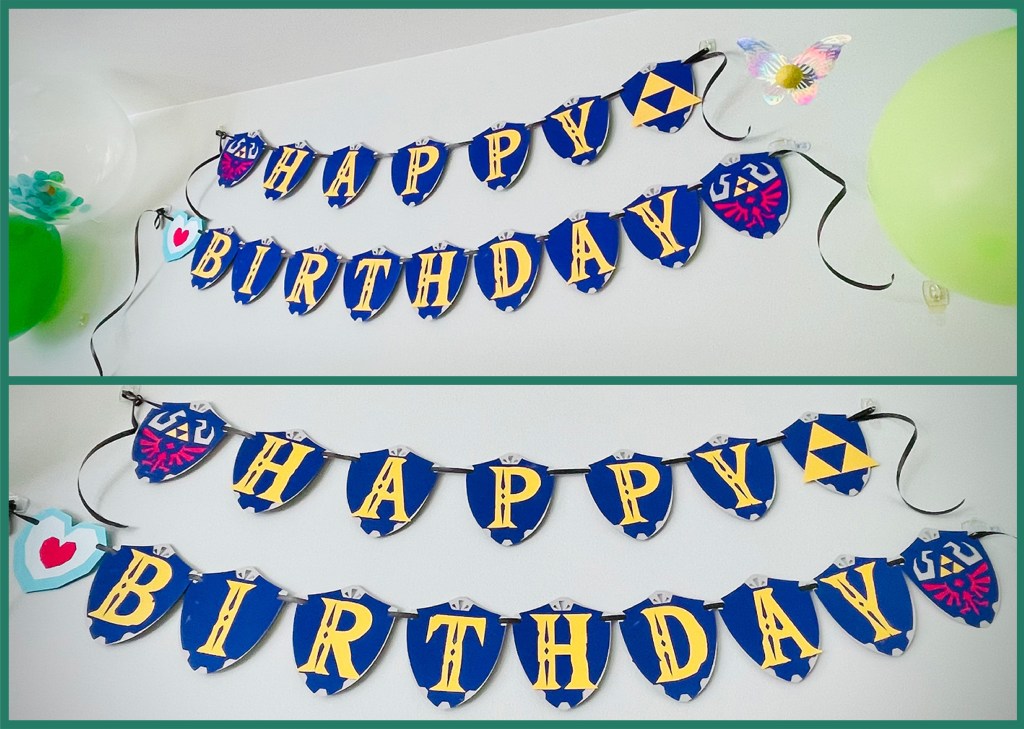
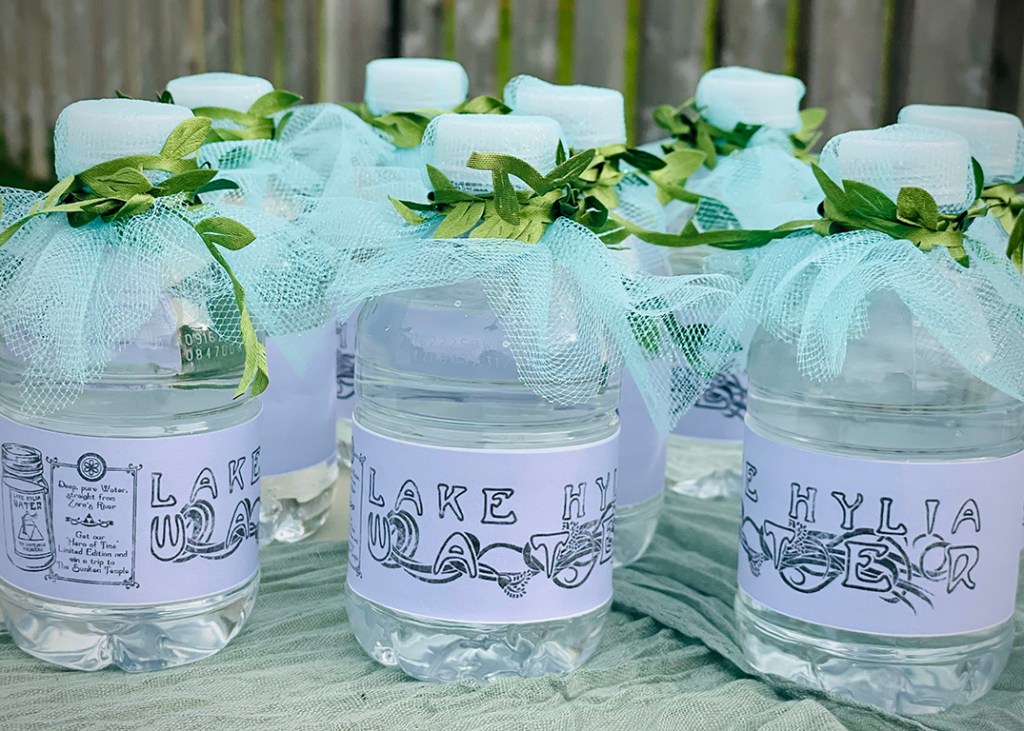
Because a main part of this party was a quest/scavenger hunt activity, and although most of that would take place outdoors, I wanted it to begin inside after all of the guests arrived. This called for a special space where the kids would gather and feel like the theme of the party was coming to life! An important character in the Zelda games is named “The Deku Tree”, and since he is the character to begin the main adventure of one of the video games, I thought it was fitting to make him a centerpiece of our party.
Zelda-Themed Decor
Kara helped me to bring the Deku Tree to life in our front room bay window. First, we worked on the tree trunk. This was really easy, and took only a bit of craft paper taped together and rolled up on itself. We had a roll of craft paper to work with, but you could easily make this for free out of left-over packing paper from your Amazon delivery boxes! We definitely used a bit that we had saved up to stuff the trunk and make it more full.
Next, we crafted the face of the Deku Tree using more of the craft paper and attaching it to the trunk with hot glue. The eyebrows, nose, and mustache were three equally rolled up pieces that we glued together and shaped. The eyes were just rolled up balls of the same paper. Easy!
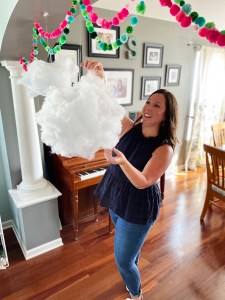
Finally, for the “leaves”, Kara had the great idea to use tissue paper! I had three different colors on hand, and this worked great to give the leaves a bit of dimension. We attached them to the ceiling with little bits of poster putty, which would be easy to remove after the party. I loved the look of the tissue paper “leaves” so much, I carried it over into other decorated spaces of the party!
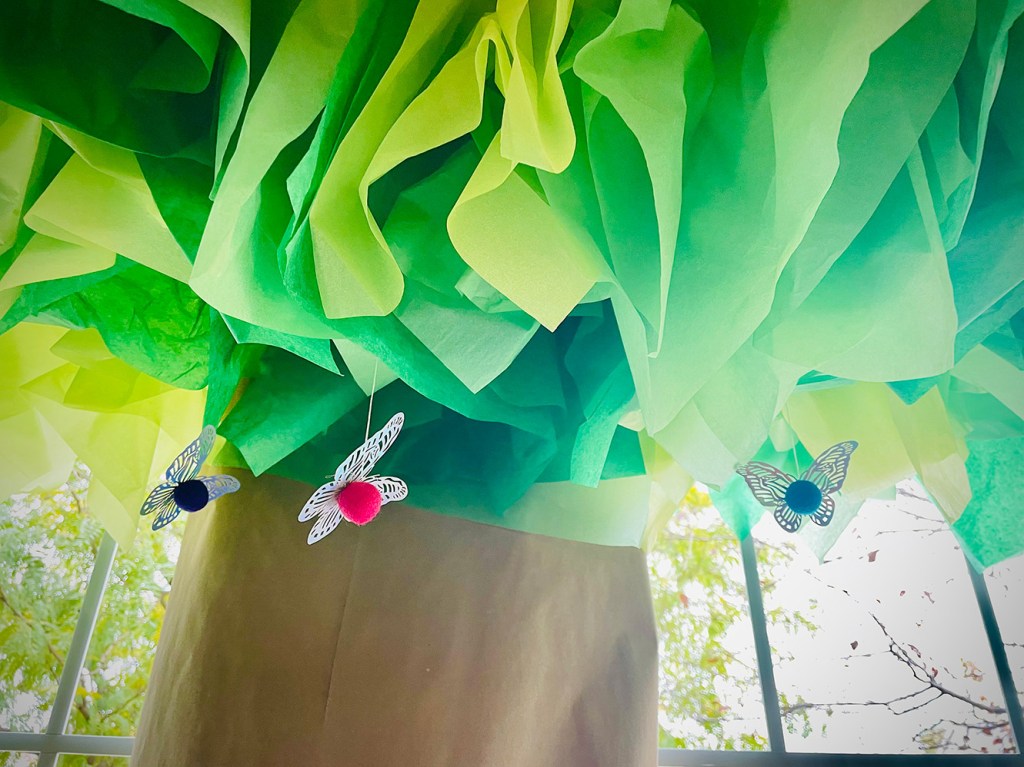
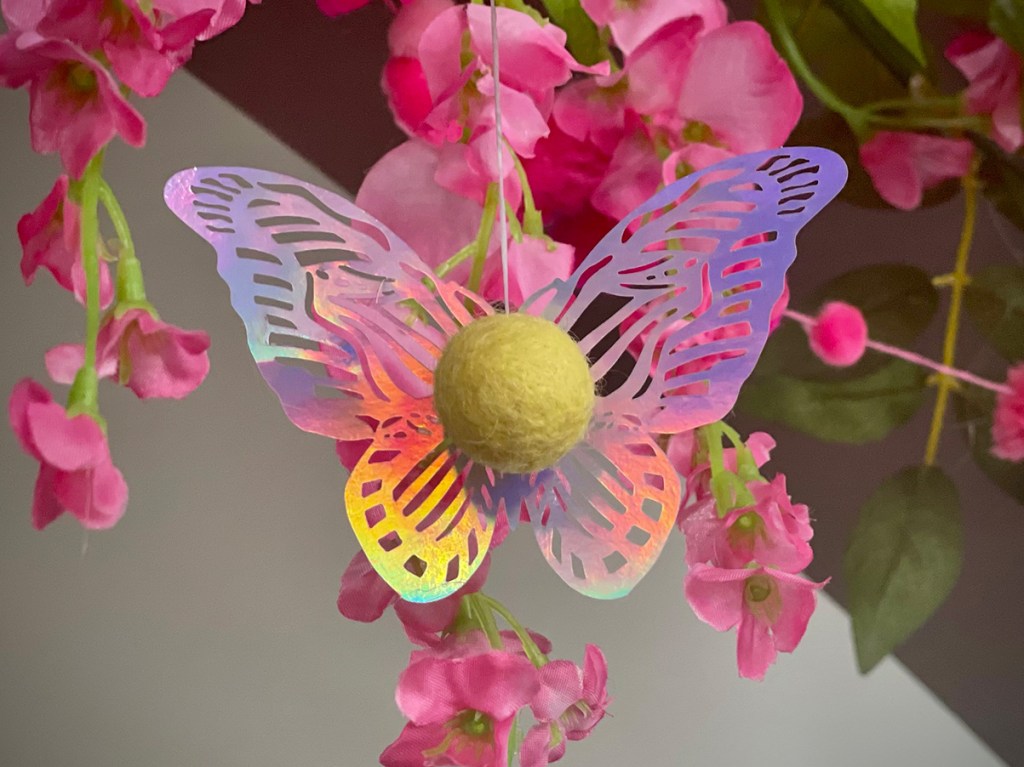
We finished the Deku Tree by hanging more fairies from the leaves. These fairies were simple to make, and I hung them everywhere! They were iridescent butterfly cutouts attached with hot-glue to felt balls. I strung them up to command hooks with some clear thread and let them hang. The wings were so pretty when they caught the light!
Final Touches
The last task was to decorate the tables that our guests would be sitting at during mealtimes and add some other finishing touches around the house to tie everything together. Where the kids would be sitting, I made sure to make it colorful, fun, and inviting.

In this room, more of the silk wisteria garland and fairies hang from the entryway and light fixure. I have a traditional-style light fixture in this room, so the silk flowers just wrapped around the arms of the chandelier. I loved the look of the tissue paper “leaves” so much, I carried it over into this room to give guests the feeling of dining under the tree canopy in the forest!
For the table, a simple gauzy table runner ran the length of the table paired with a fairy light flower garland to wrap around the other decorations that I used there. Shiny, gold painted acorns and faux mossy rocks were also scattered along the table runner.
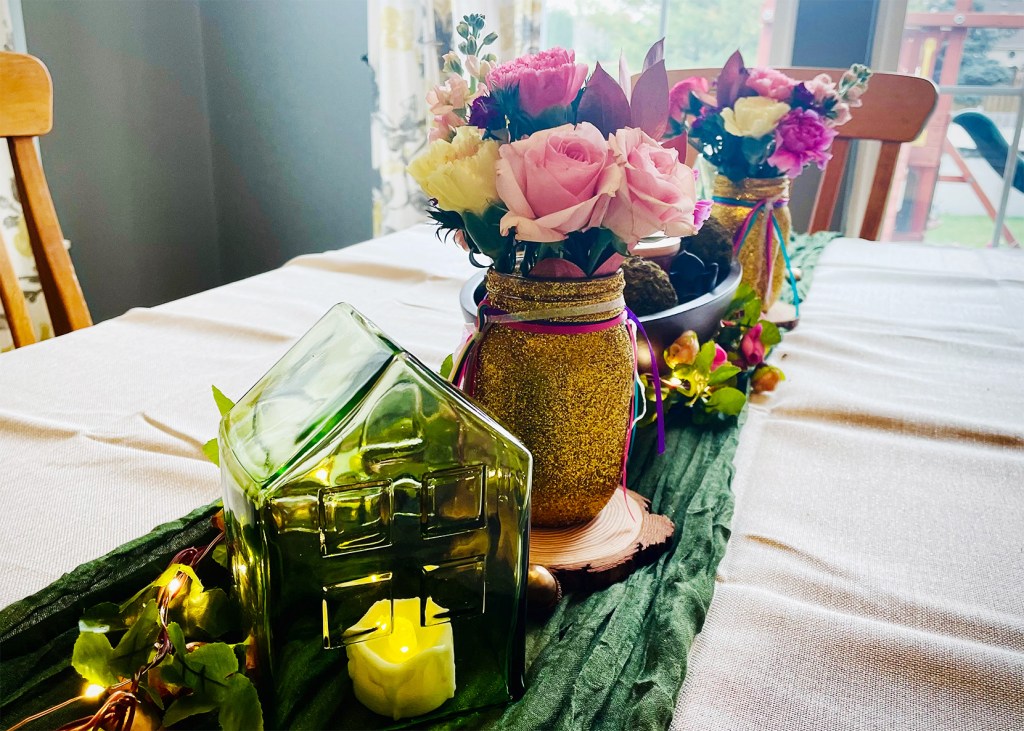
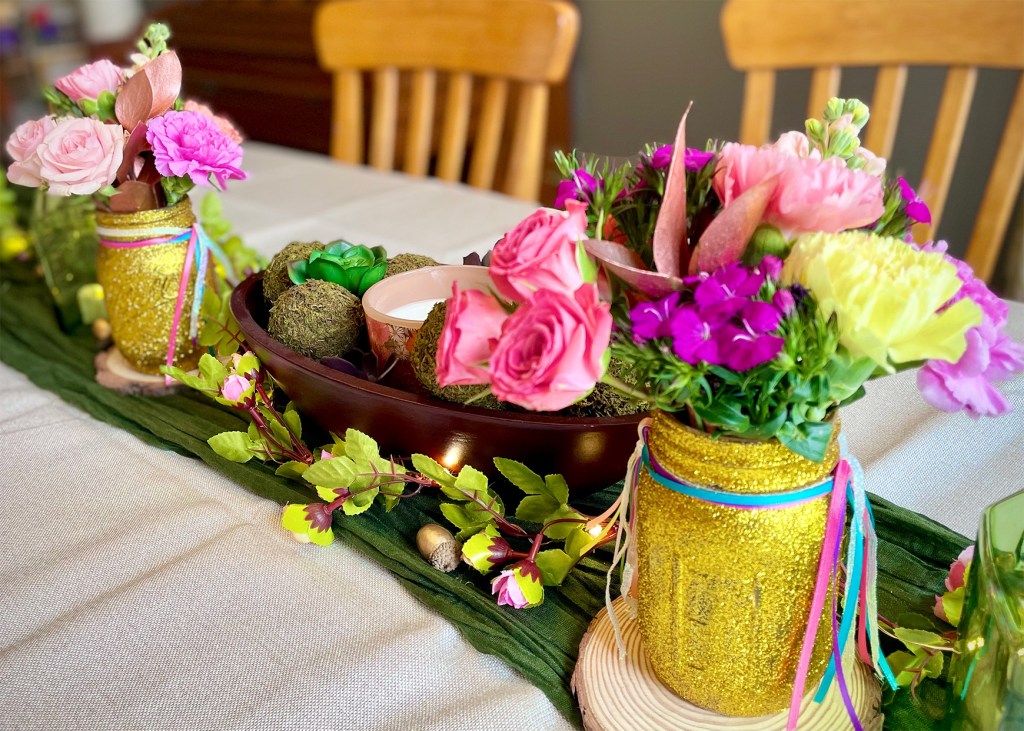
To add more light to the table, I added green glass fairy houses and flameless votive candles. The fairy houses were also a Target Halloween dollar spot item! More of the gold glitter mason jar flower vases were set on wood craft slices, and Kara offered a moss ball display container she used in one of her projects. I love when I’m able to repurpose party decorations!
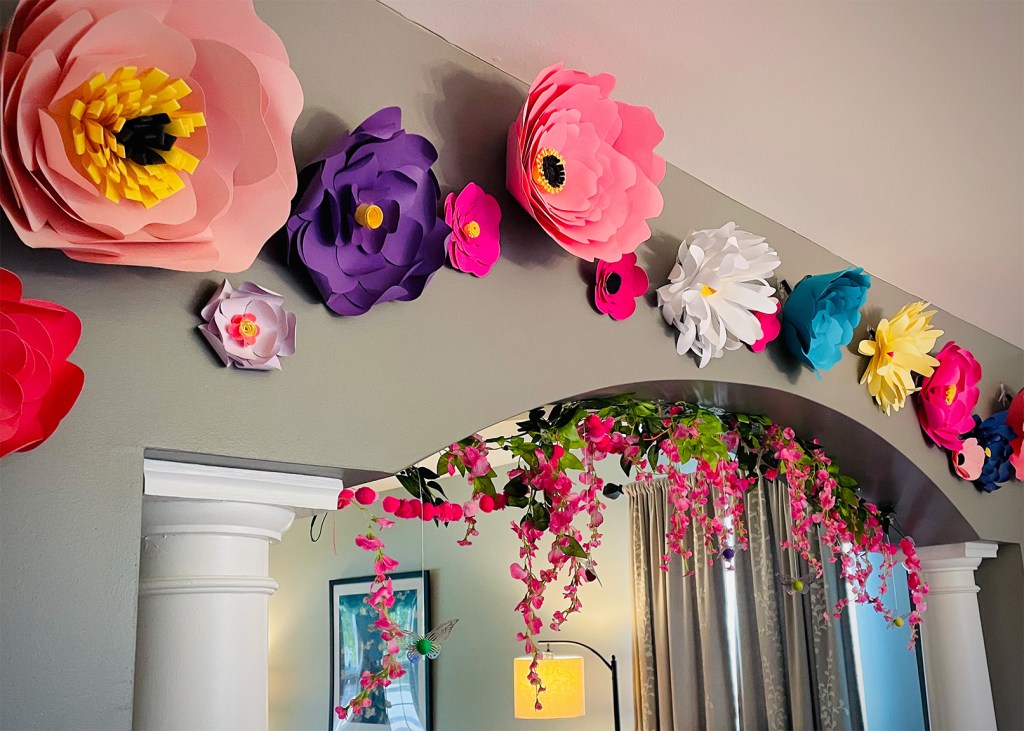
Finally, these paper flowers hung along the entryway to the dining room for a big pop of color! Originally crafted with my Cricut machine for another party, I’ve used them several times for parties or even just in the springtime to bright up our living space! Yes, my basement is packed with bins full of party decor…maybe organizing that will be a blog post for another day! 🙂
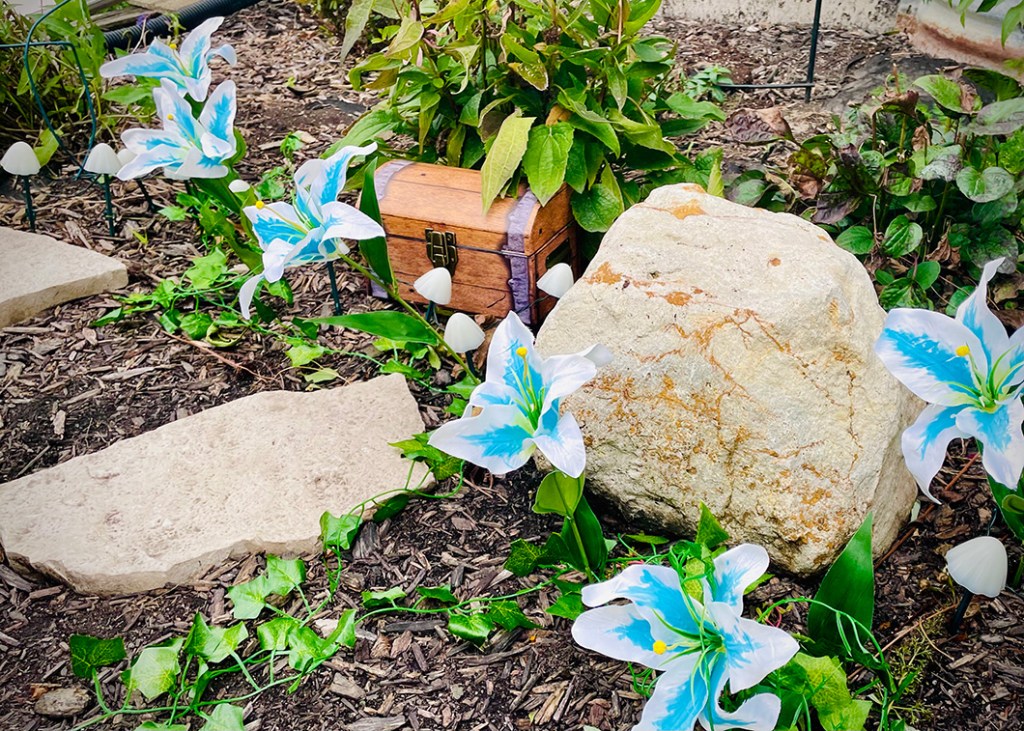
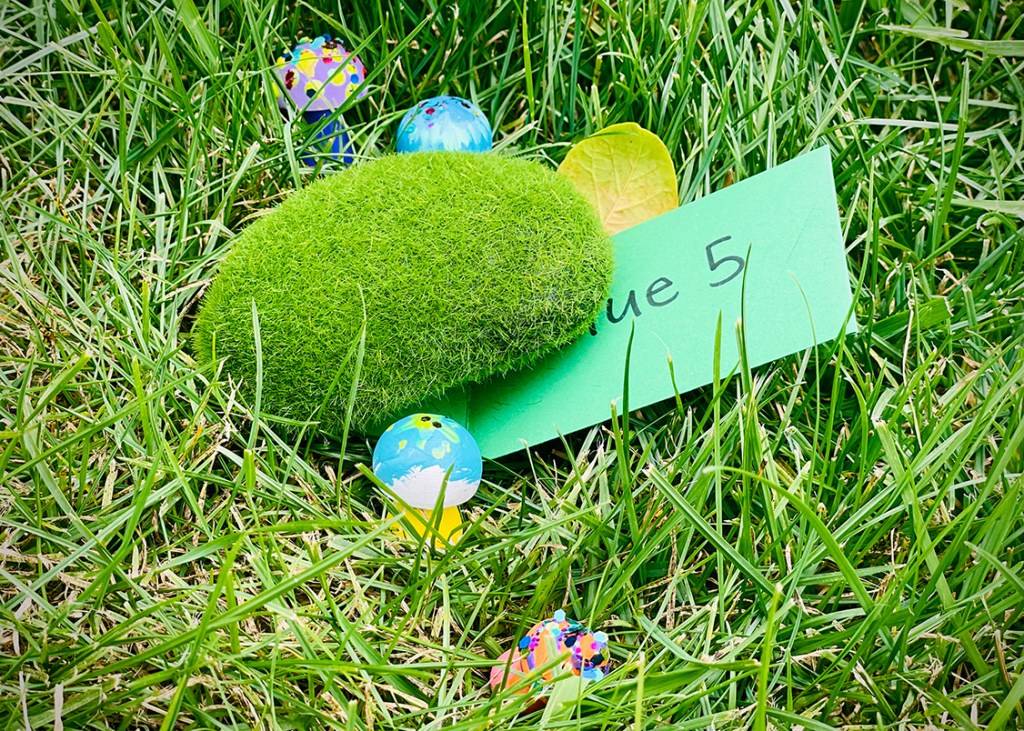
Hope you enjoyed this recap of our Epic Zelda-Themed 6th Birthday Party! Check out the sneak-peek of photos below from our upcoming “Legend of Zelda 6th Birthday Quest” scavenger hunt blog post, which really was the main point of fun for the kiddos at this party. Stay tuned!
Follow us on social media to get in on the conversation!
Hi! I’m Jen. When my husband and I welcomed our first daughter in 2013, I left behind full-time employment in marketing graphic design and event planning to become a stay-at-home-mom. These days, I love planning uniquely-themed parties for my girls and adding colorful, unexpected spaces to my home. I also spend a lot of time crafting and gardening and adding flowers to just about everything! I hope you’ll enjoy following along on some of our projects, and sharing some of yours with us on social media!

Leave a comment