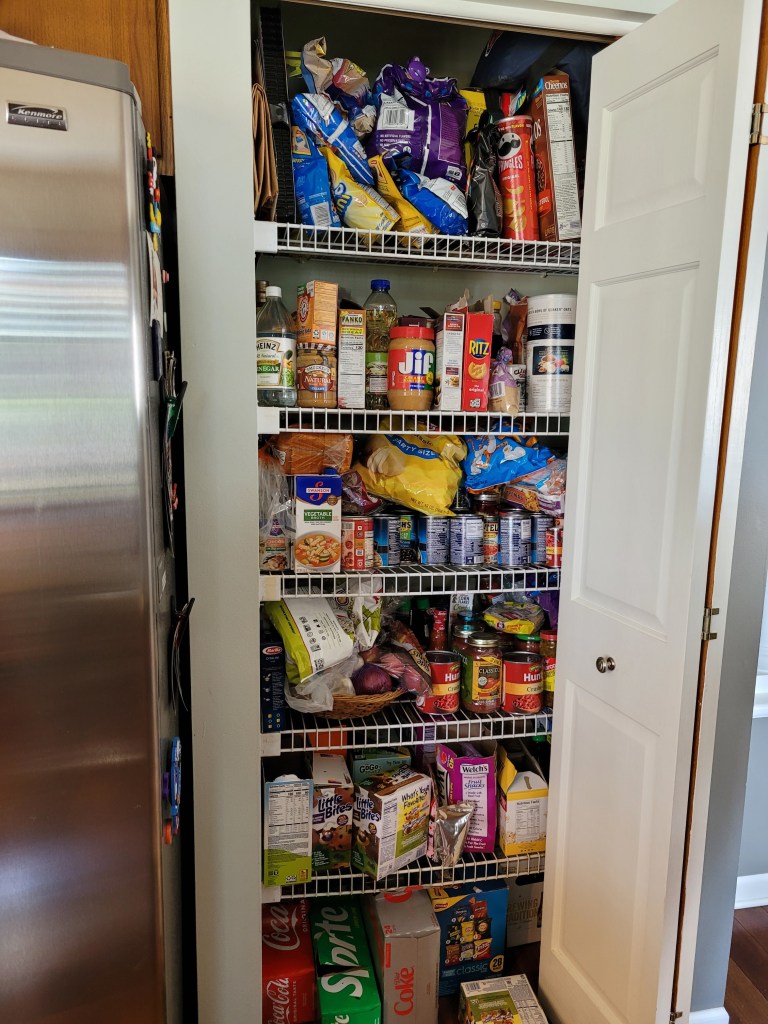
Do you want to pull out your hair when you try to find something in your pantry? Does expired items just continue to hide out in the back of it? Are you completely overwhelmed with your pantry and frustrated that your pantry isn’t providing what it needs to? We hear you!
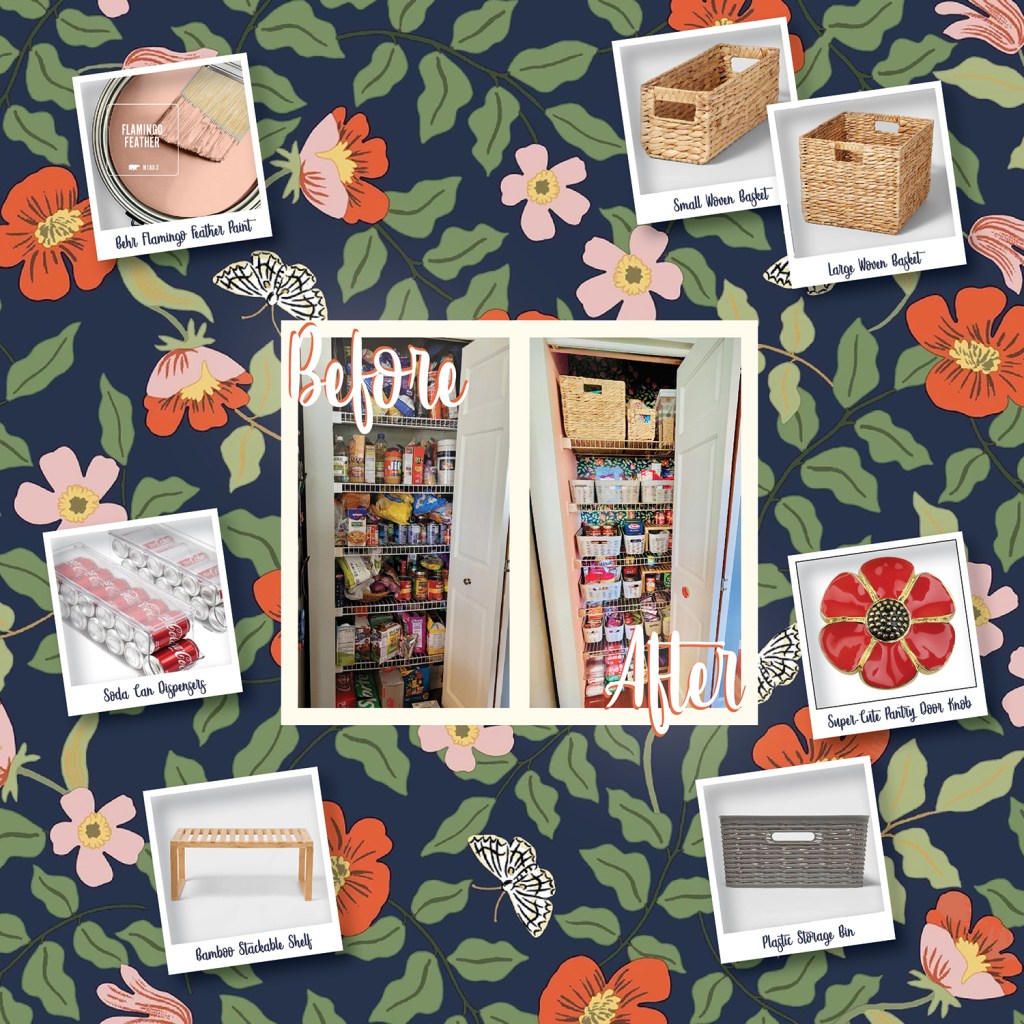
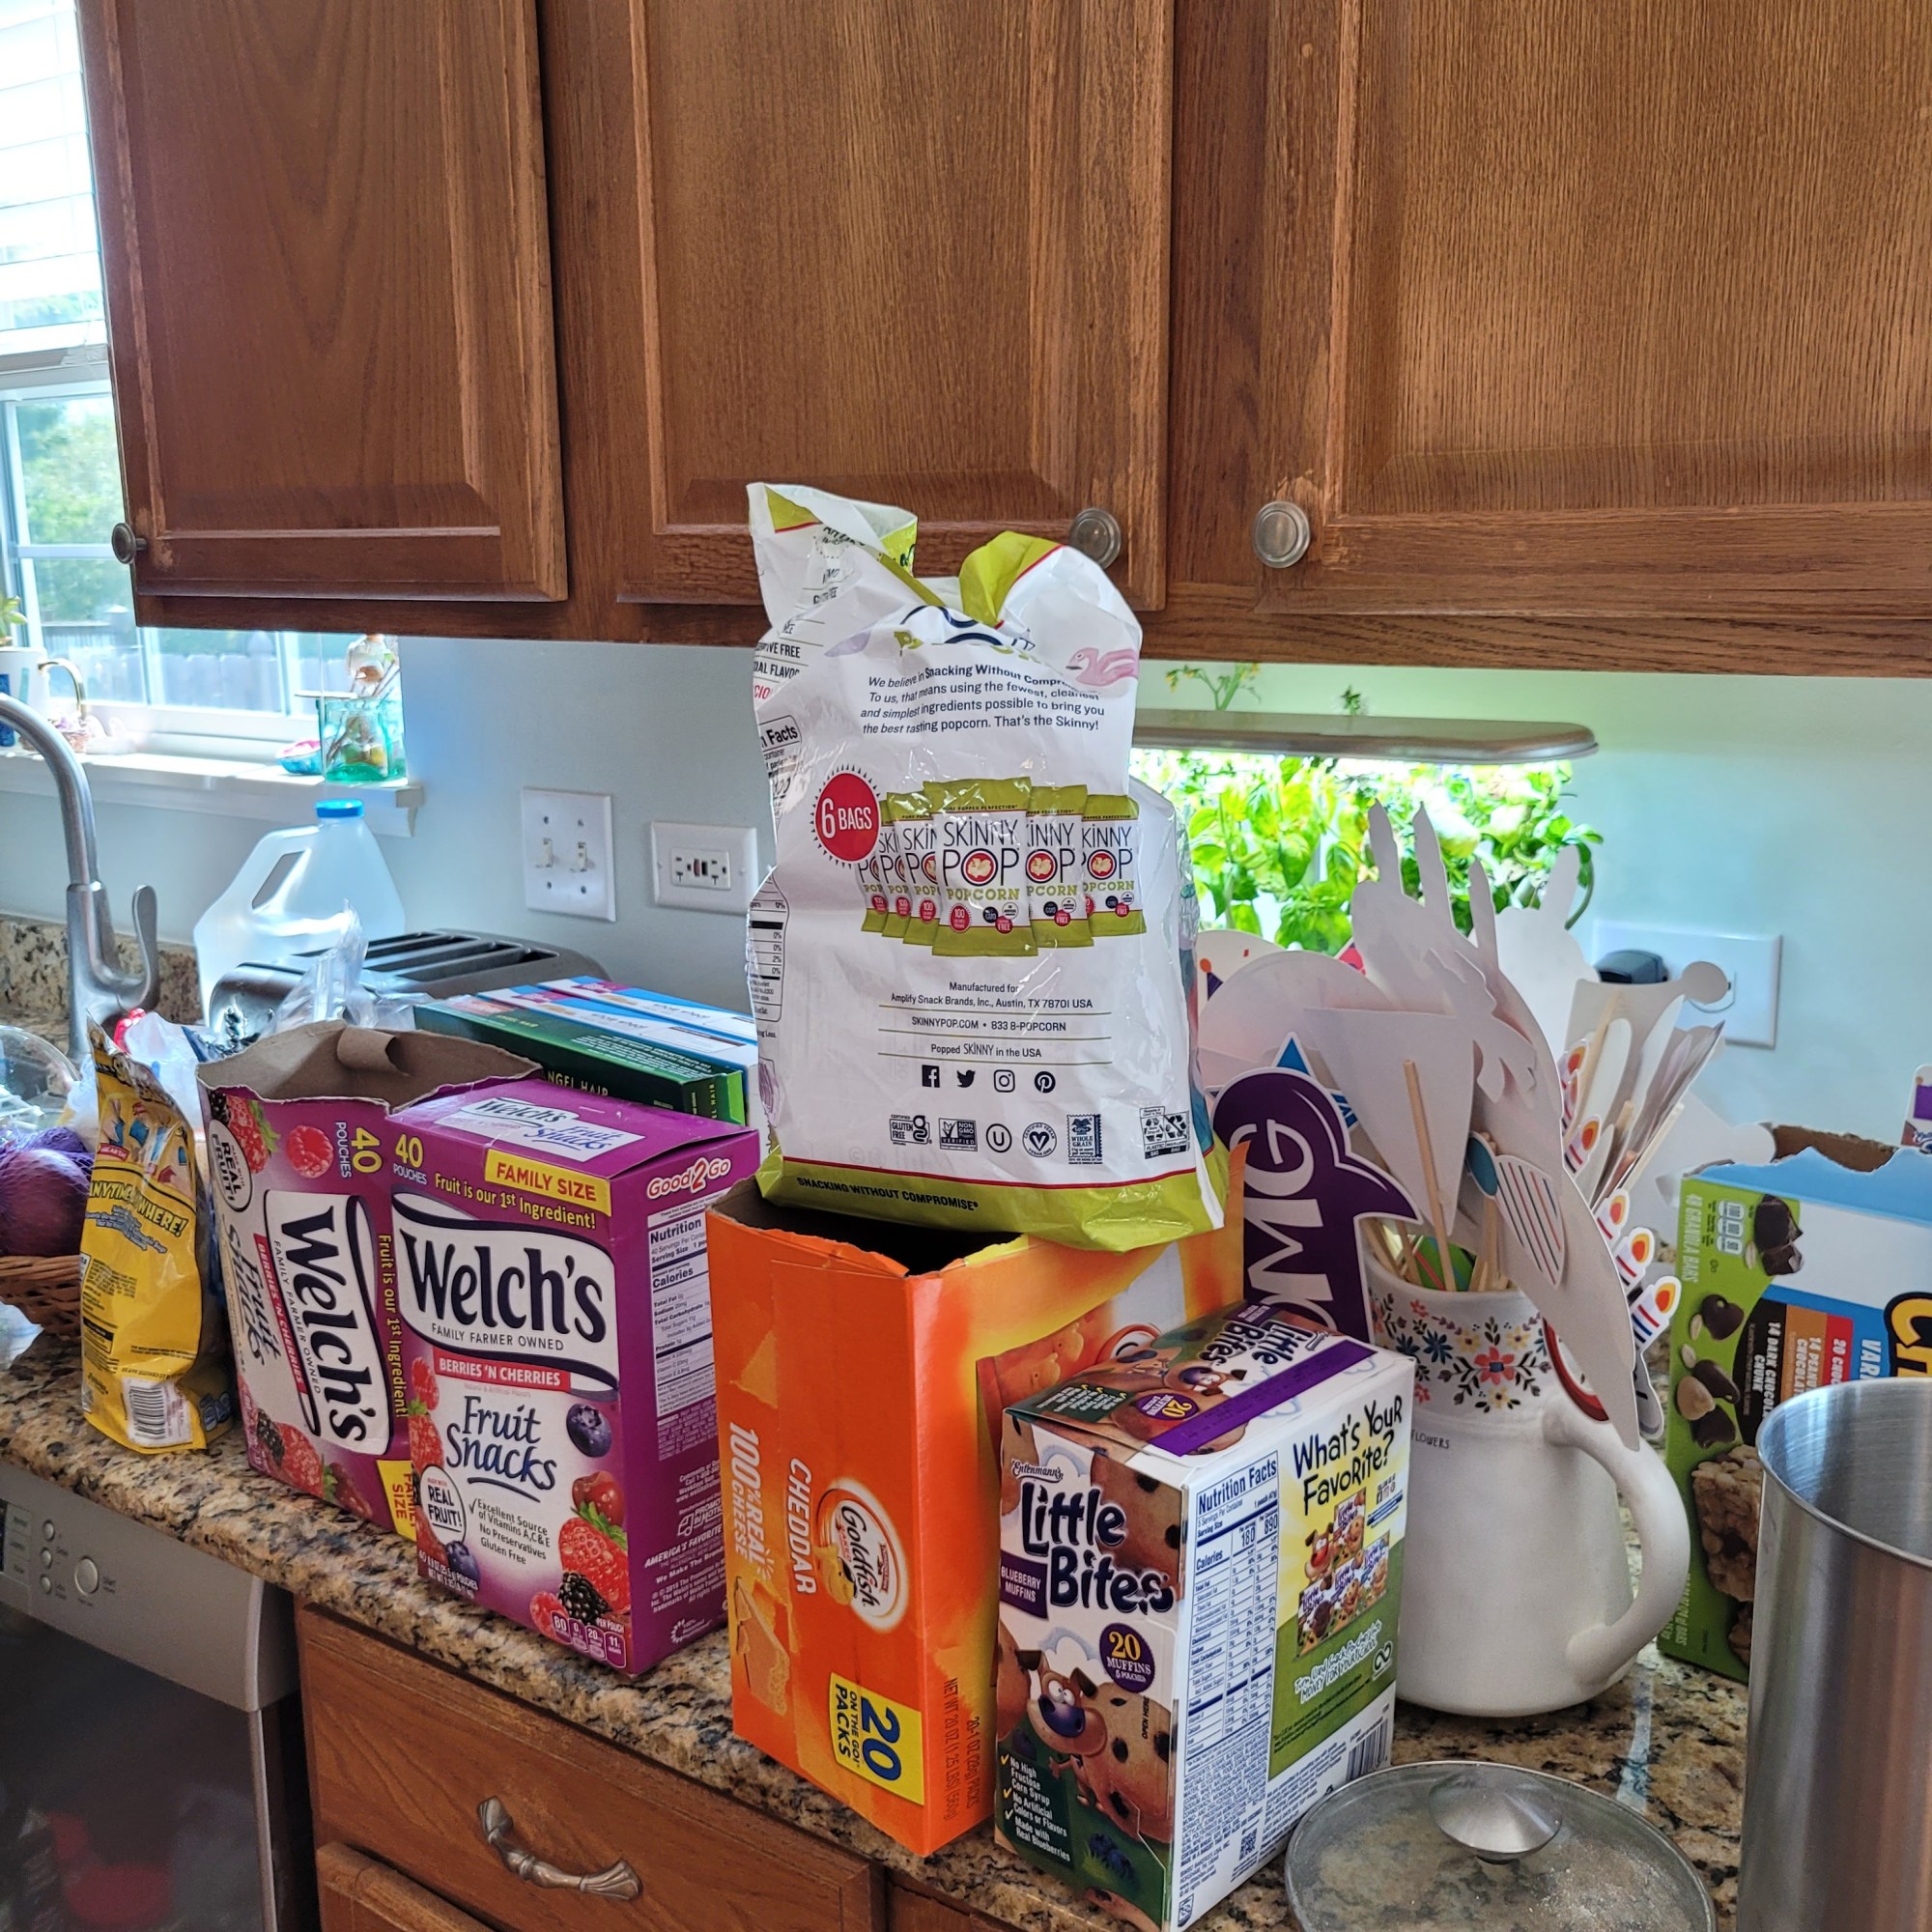
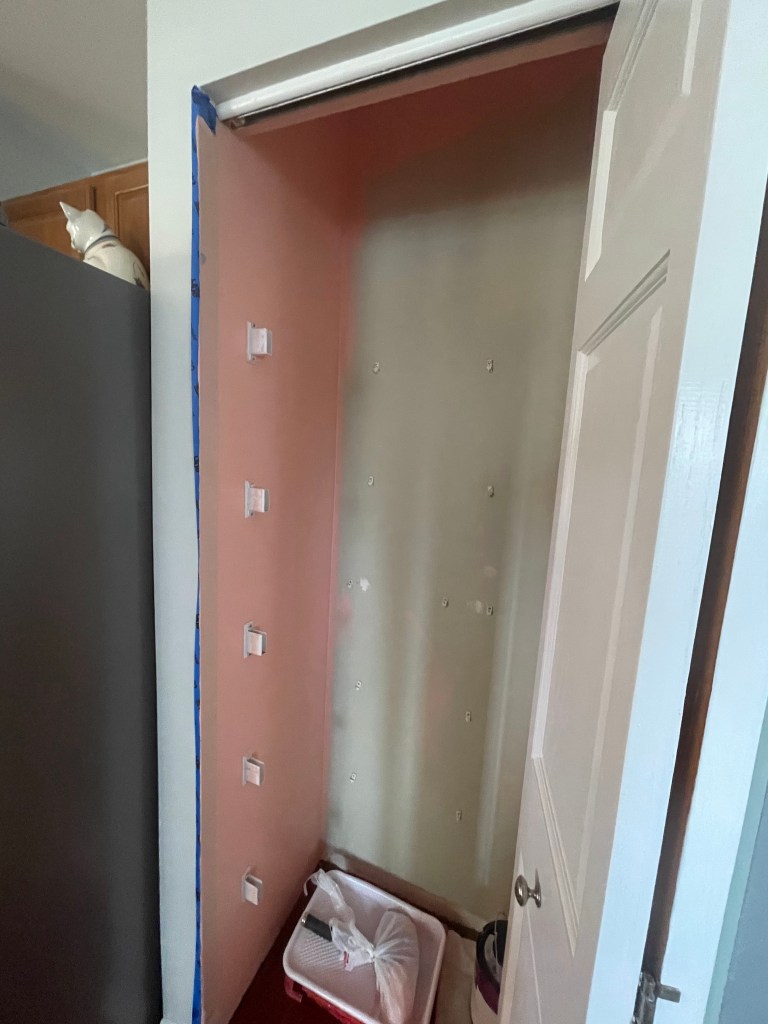
Jen’s pantry needed a organizational and design tune up (see below for the “before” picture). To spruce up the space, we put together a plan in order to stay on track. Our plan helped us stay on budget, time, and helped us stay true to the vision. Follow below to see how we did this project step by step!

#1- Make a Plan!
Plan, Plan, Plan – If there is one thing that Jen and I will always tell you is to make sure you understand the full scope of your project before you get started. It helps eliminate any surprises along the way. We made our way through the checklist below to ensure we understood exactly what was to be done with this space.
Planning Checklist
- Budget –
- How much do you want to spend on this project? This will affect everything so it’s best to have an idea before you start.
- Vision –
- What do you ultimately want from this space?
- What is your vision of the space?
- Do you want items on certain shelves?(ie: snack shelf, breakfast shelf, sides shelf, sweets shelf, pet shelf, etc)
- What makes sense for you and your family?
- Timeline –
- How much time do you have to spend on this project?
- Take Inventory –
- What’s in your pantry?
- Do you need all of it?
- Does some of the items need to be relocated to another part of the kitchen?
- Are there expired items?
- Are their non-pantry items hanging out that you need to relocate? Or do you plan on keeping them there?
- Measurements –
- What are the dimensions of each shelf? You’ll need the height between each shelf, the width of each shelf, and the length of each shelf.
- How many shelves are there?
- How tall is your ceiling (needed to calculate the amount of wallpaper needed)?
- Personalization –
- How do you want to make the space yours? Our favorite part! Let’s make it yours! Wallpaper, change of shelving, painting, etc.
- Working order-
- Is everything in working order?
- Are the shelves still securely attached to the wall?
- Are there any other things to consider that may be a potential problem moving forward?
Here are some suggestions as you work through the checklist:
The first and arguably the most important step is to come up with a budget. Depending on the size of your pantry and how “fancy” you want to get with this project, your costs can be quite high. Be realistic. Unless you have containers or shelf organizers already socked away in your house, you will need to buy them. They can be as inexpensive as finding some at your local Dollar Tree or you can go all out and get some from The Container Store. They will most likely be your largest expense in this project. If you are wallpapering, this will also be a larger expense.
Understand what you want your space to look like. Draw a simple picture of your pantry noting measurements of each shelf (this will help you with your shopping step). Also you’ll need to decide what you would like on each shelf.
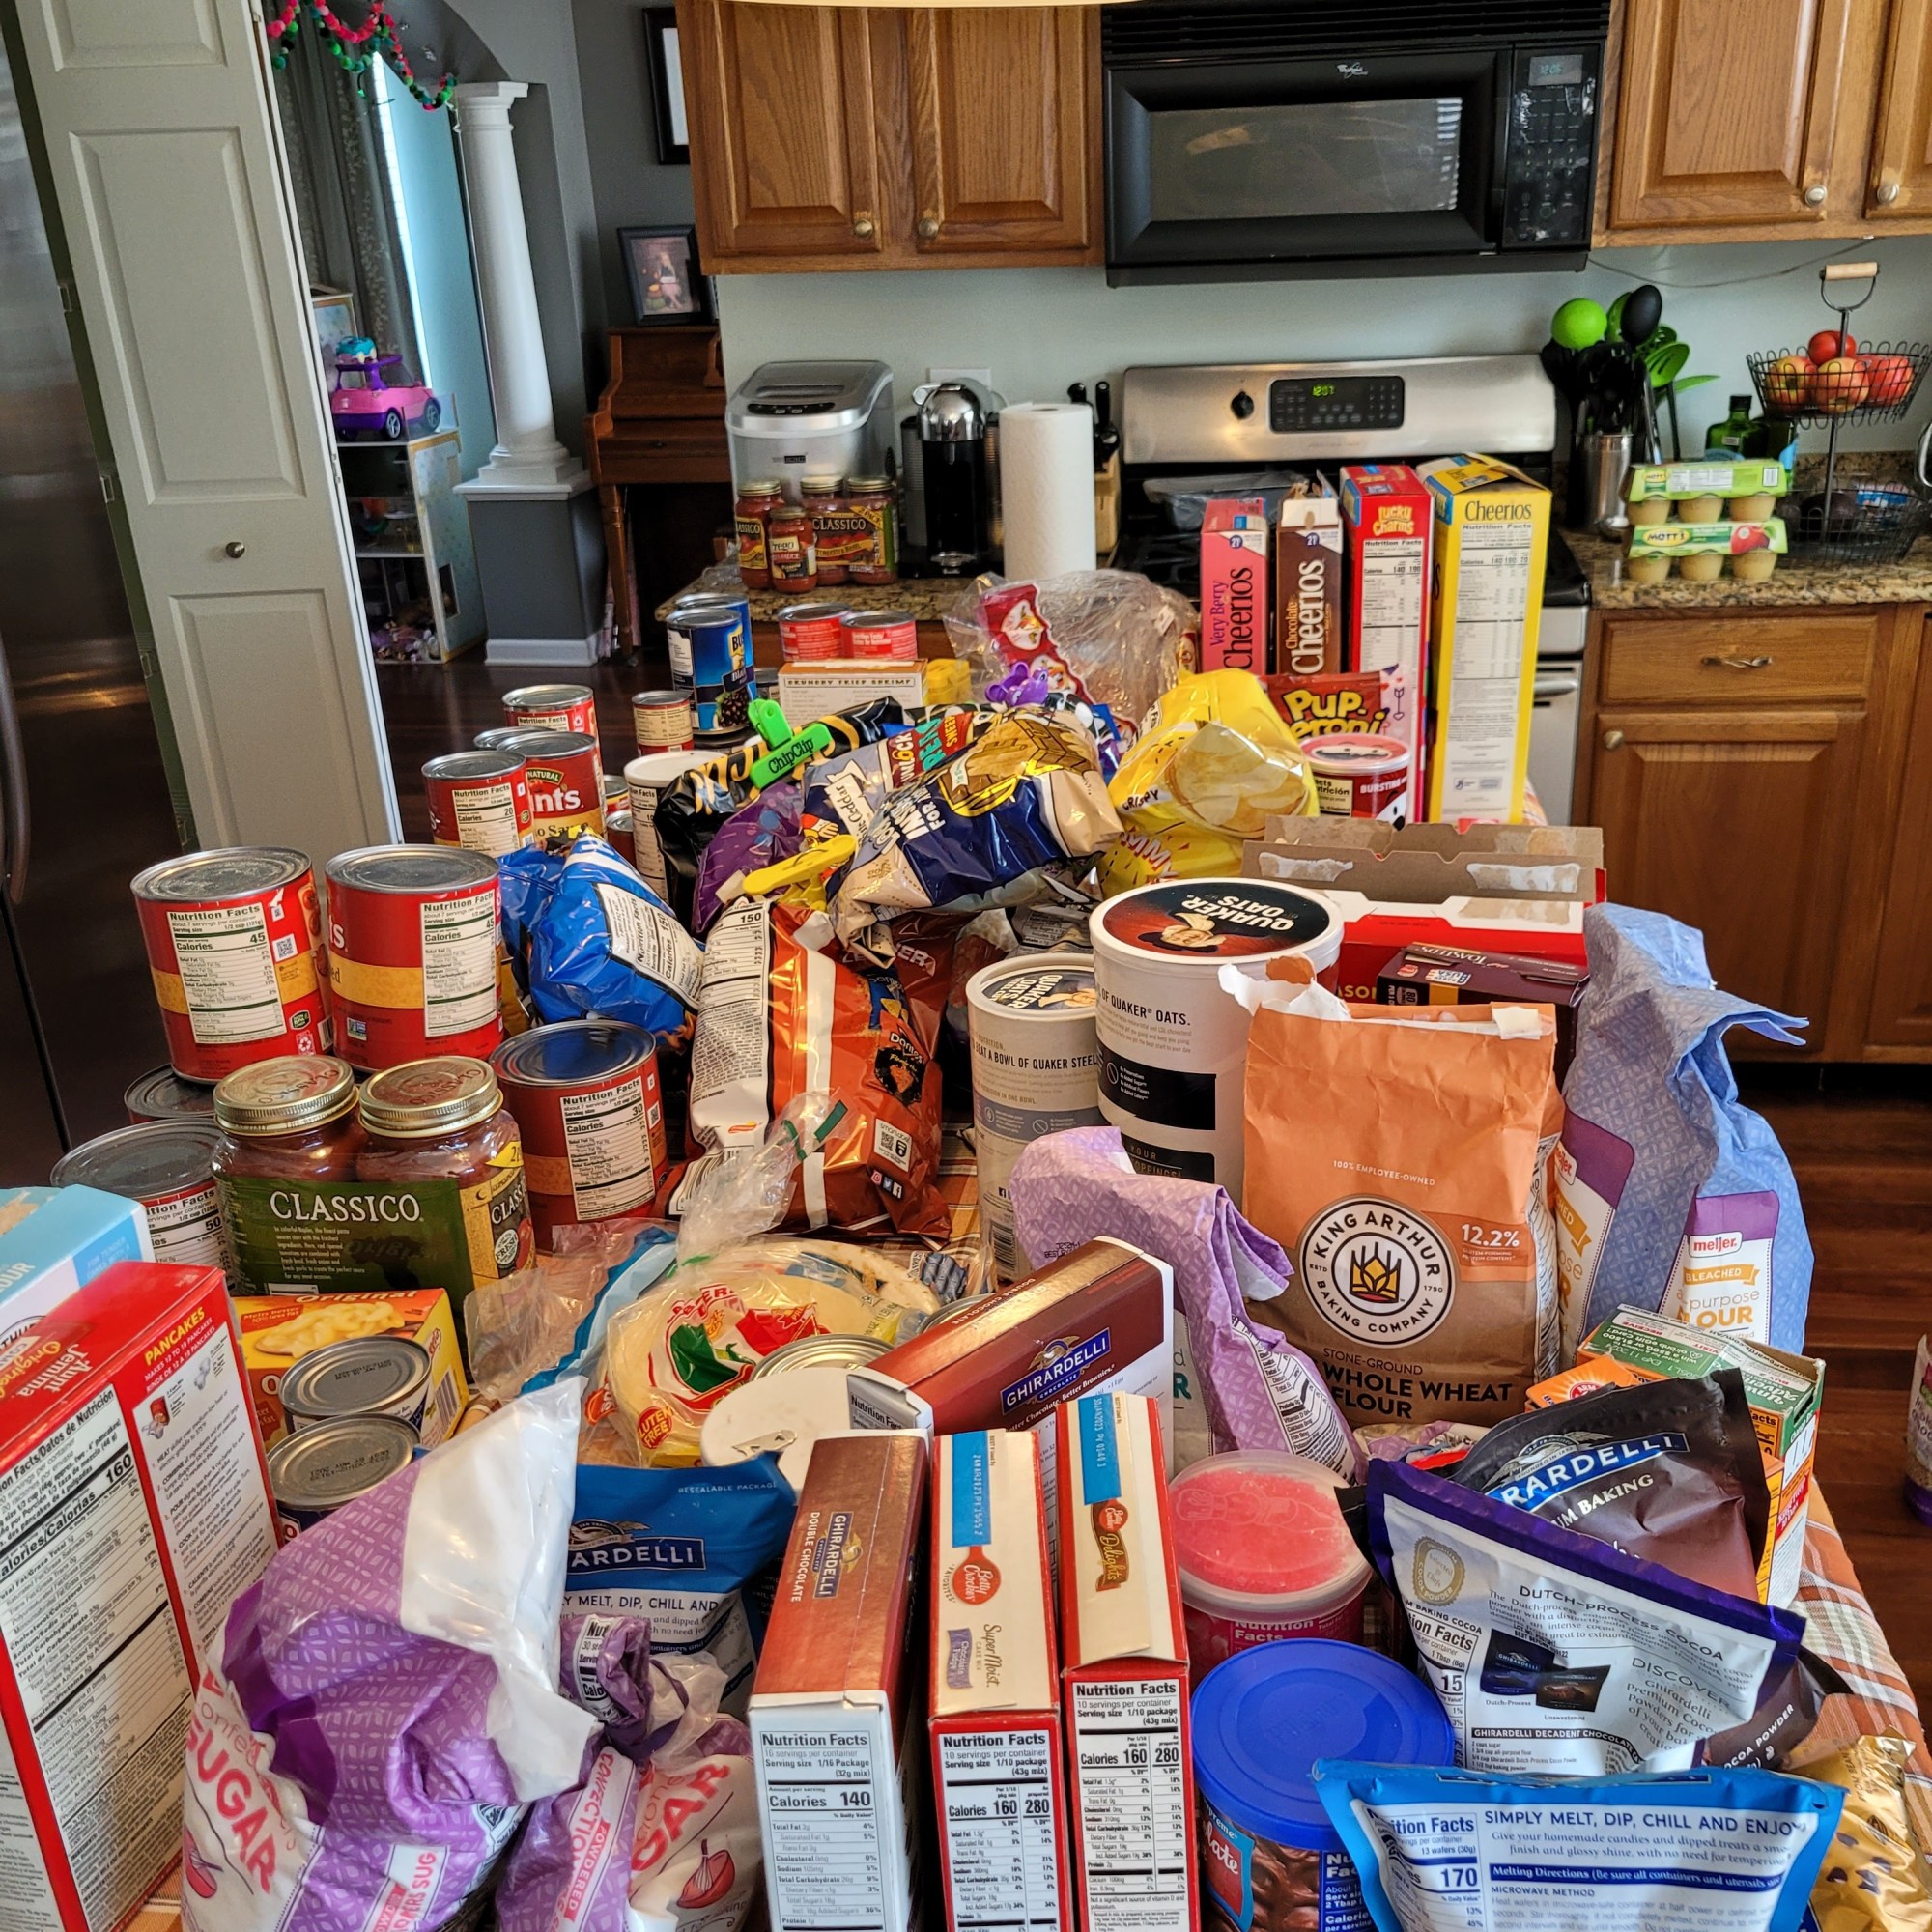
Jen and I walked through the checklist and made notes on each section. After that, we got to work! Jen drew up a rough sketch of her pantry including measurements. She decided that she wanted wallpaper and a few special surprises in the pantry (ie: special door knob, a pop of color to change up the boring wire shelving and a couple of different types of containers). Next, we pulled everything out of her pantry to understand what was in the pantry!
Based on what she was keeping in her pantry and what would work best for her and her family, we decided to group items together and assigned each shelf accordingly. Of course for your pantry, make a plan based on your pantry items & what you need in your pantry.
- Top Shelf: Chips/Snacks/Treats, Bread & Cereal Containers (to keep out of reach of children)
- 2nd Shelf: Baking Shelf (Cake mixes, flours, sugars, frosting, baking decorations, etc)
- 3rd Shelf: Pasta & Tomatoes (sauces, paste, diced, spaghetti sauce, pizza sauce, etc)
- 4th Shelf: Rice, Grains, Beans, other Canned goods
- 5th Shelf: Kid’s snacks (easily reachable)
- Floor: Canned beverages, Potatoes, Garlic and Onions
At this point, we decided to put everything back into the pantry per the shelving assignments. We didn’t have enough time to move forward with the next step that day but you may have enough time! Moving on to the Clean & Repair step!
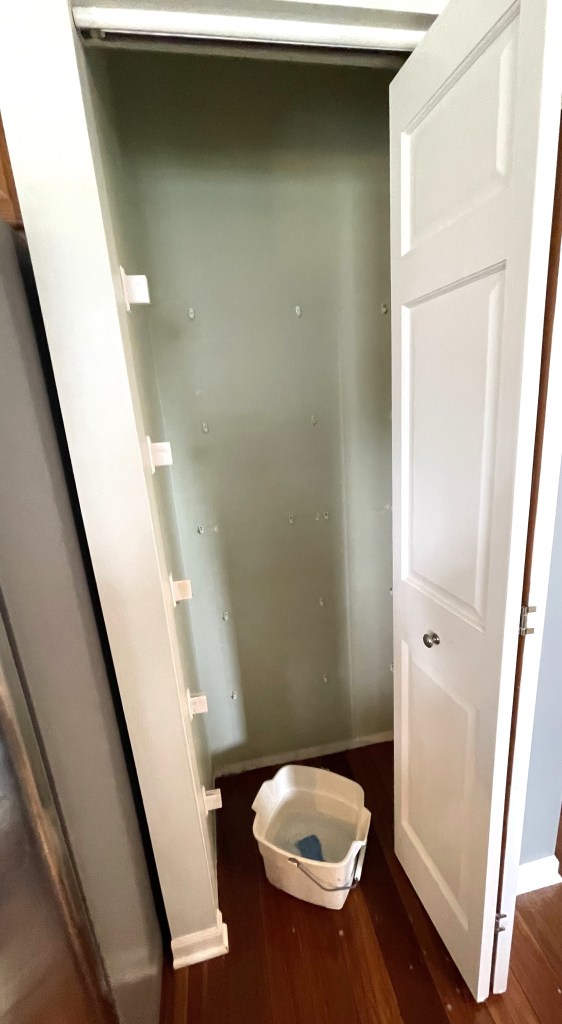
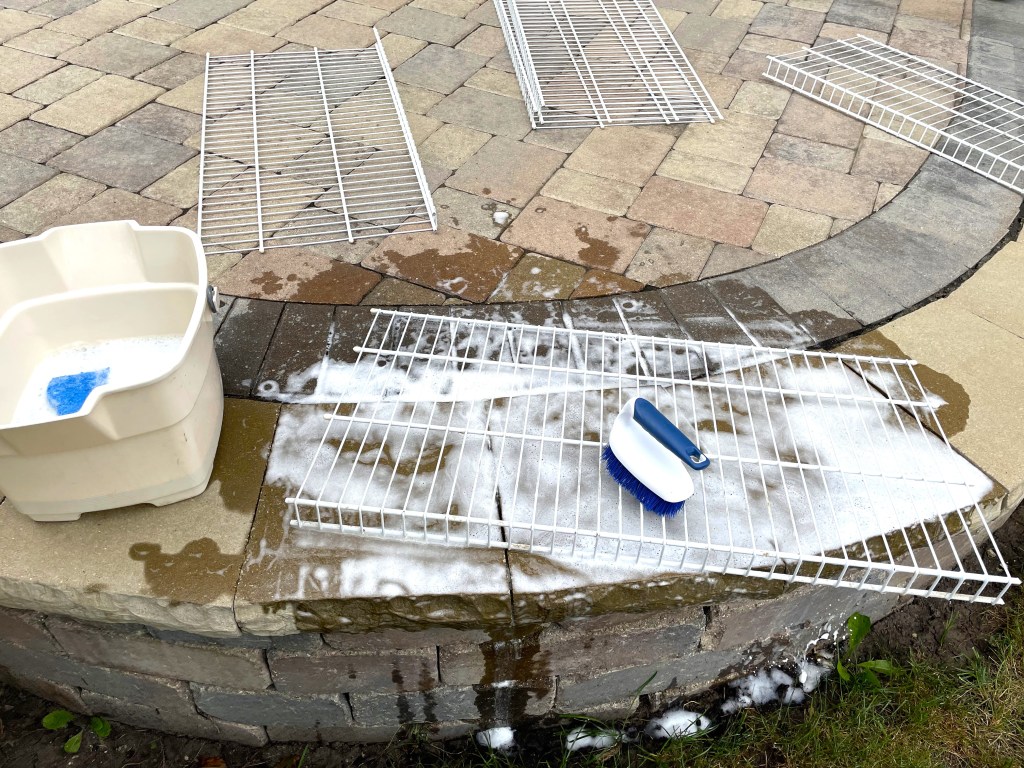
#2- Clean & Repair
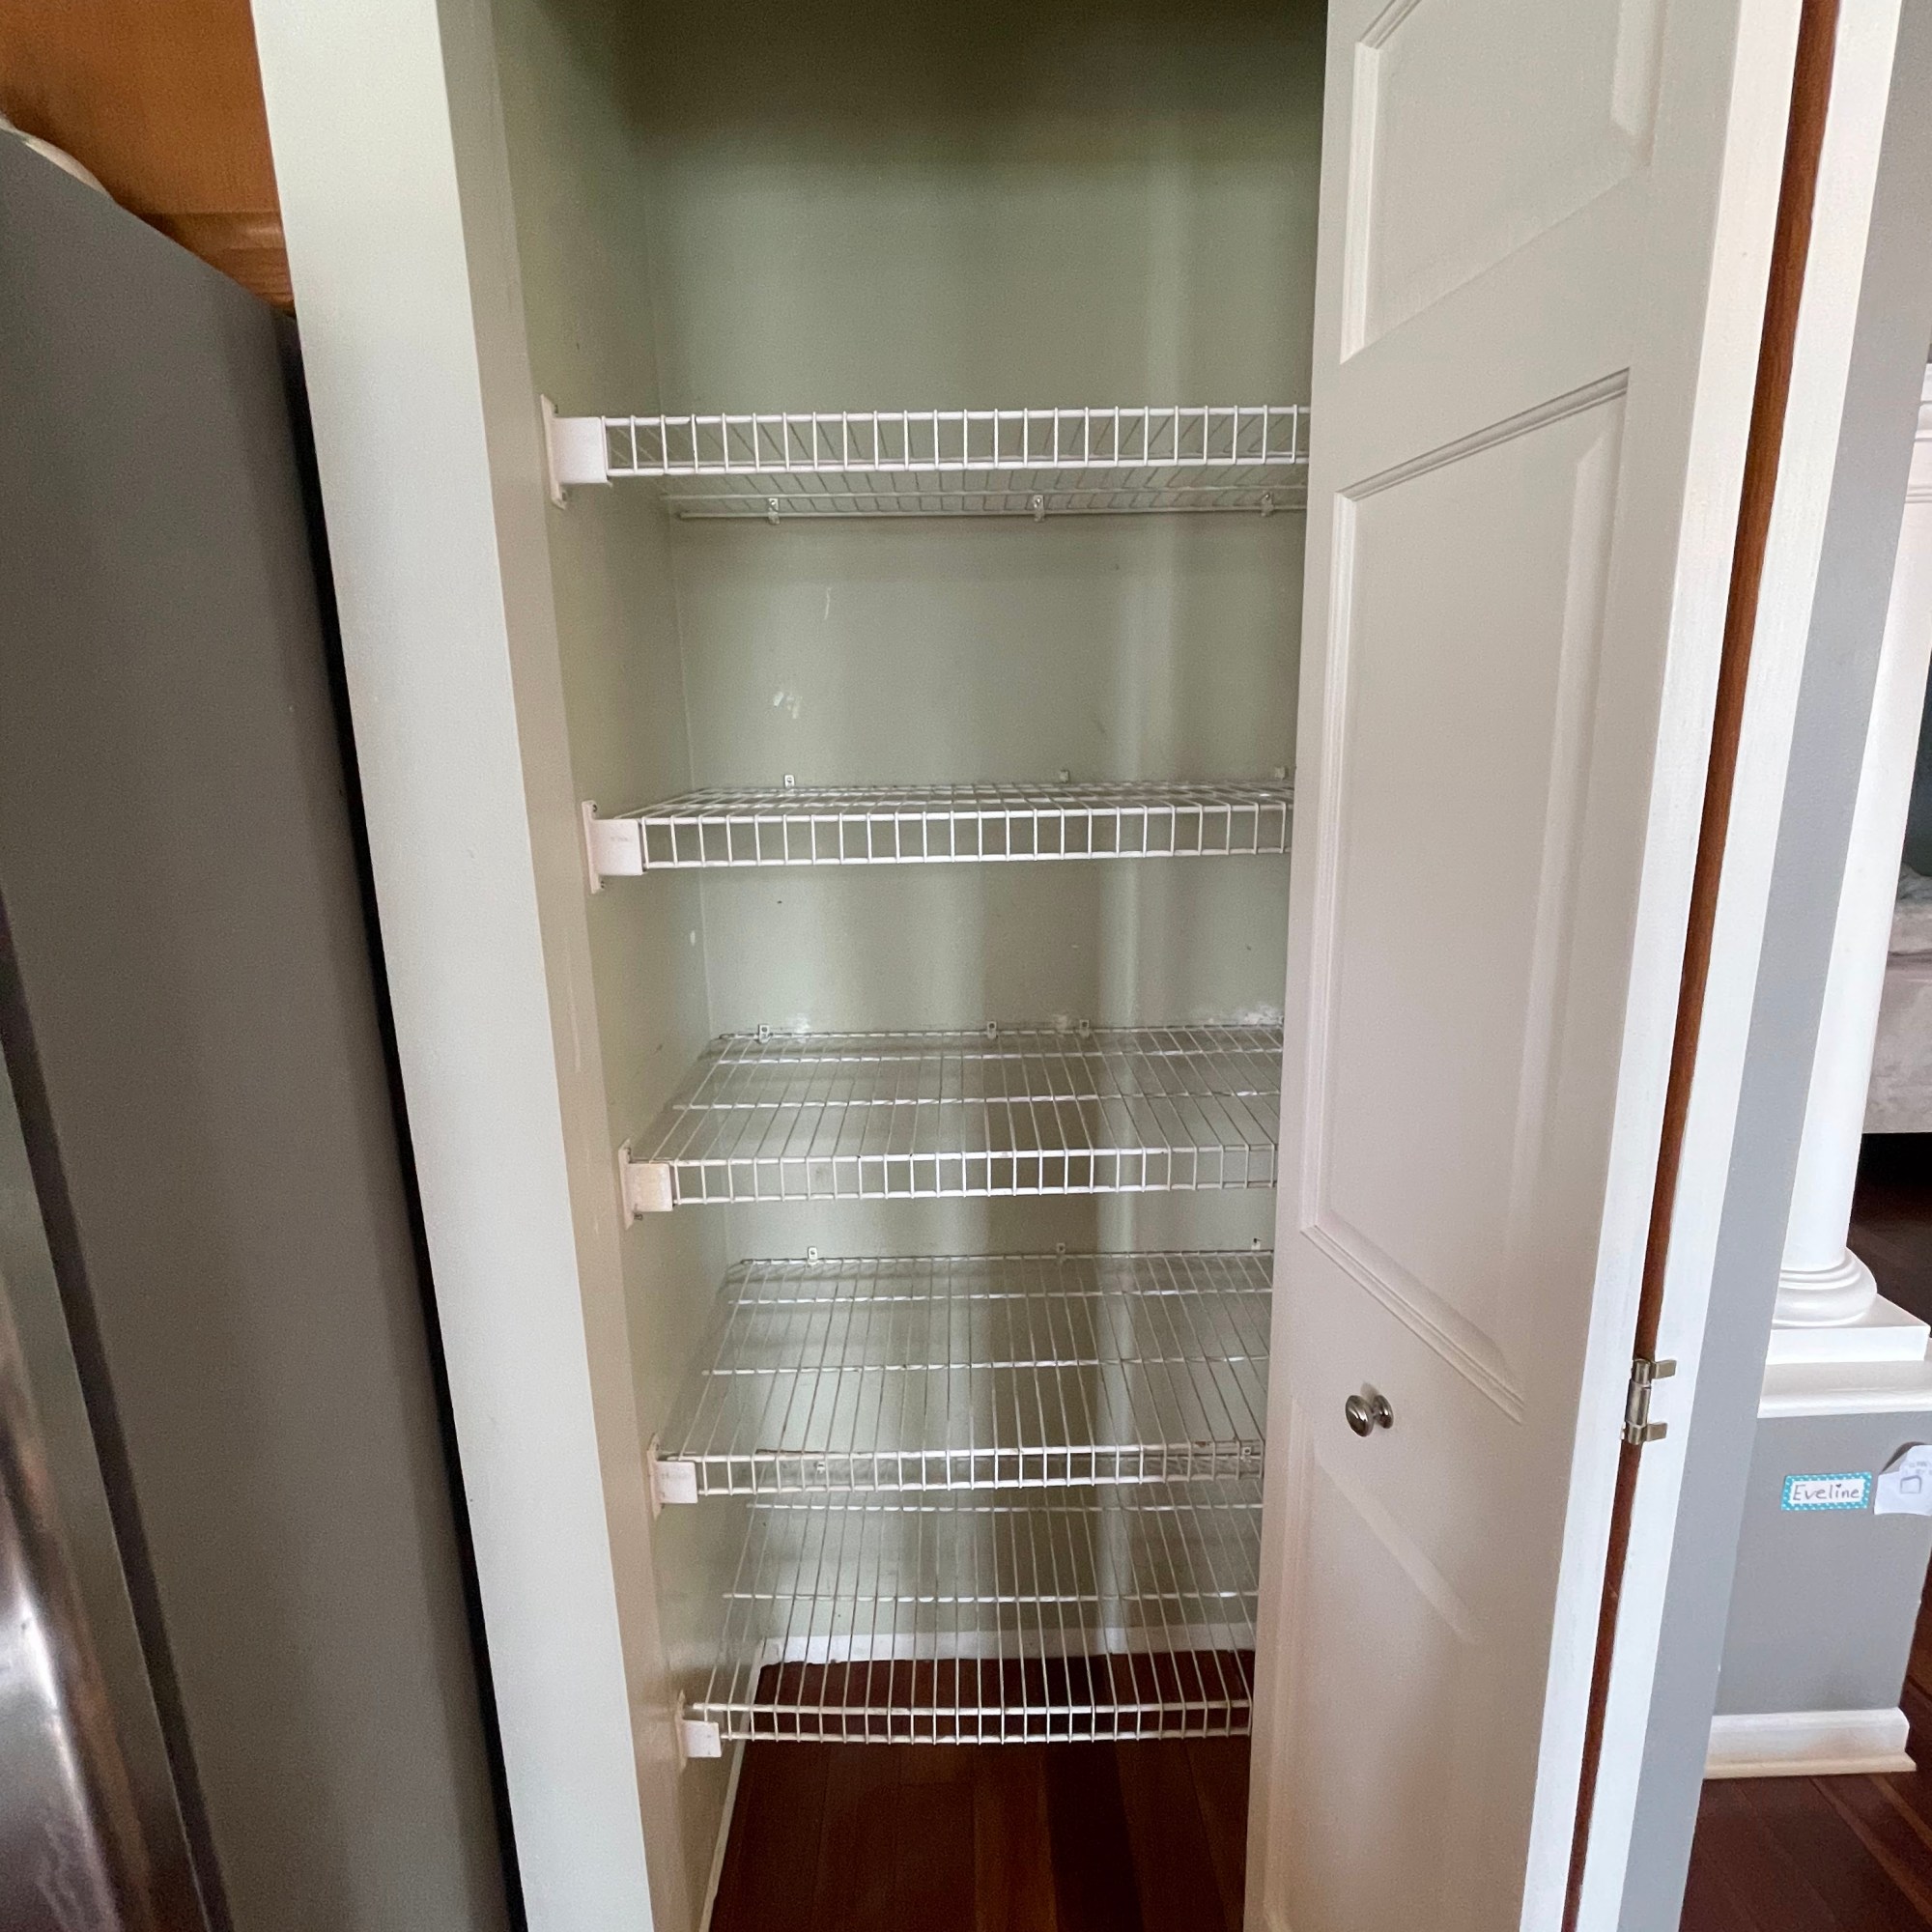
This is not the most glamorous or exciting part of the project but completely necessary for the success of your project. Pull everything out, everything. As you pull everything out, make sure you get rid of any unwanted or expired items (unless you would like to use up those items in the near future – it’s ok we won’t judge). We cleaned Jen’s pantry by washing the wire shelving, ensuring the shelving was securely attached to the wall, swept & mopped the floor and finally, wiped down trim, etc. You can put your stuff back in the pantry in a more organized manner until you have completed the shopping step.
#3- Shopping
One of my favorite past times! You could probably achieve this step during the same time frame as your clean & repair time frame. Maybe while you are sitting down with your morning coffee or during some down time. Use your drawing from your plan stage to decide what you want on each shelf and what kind of organization tool you would like to use. Maybe it’s plastic containers, baskets, lazy Susan turntables, canned good dispensers, shelving risers, cereal containers, etc. The options are endless – of course, your choices will depend on how much money you are willing to spend so keep it in mind. This is also the time to start shopping for your wallpaper, paint, spray paint, plexiglass (if needed for stabilization of canned goods), etc. Make it yours! Be mindful of your container color and material choices – be sure that those align with your “personalized” features in your space (like wallpaper, wire shelving, etc).
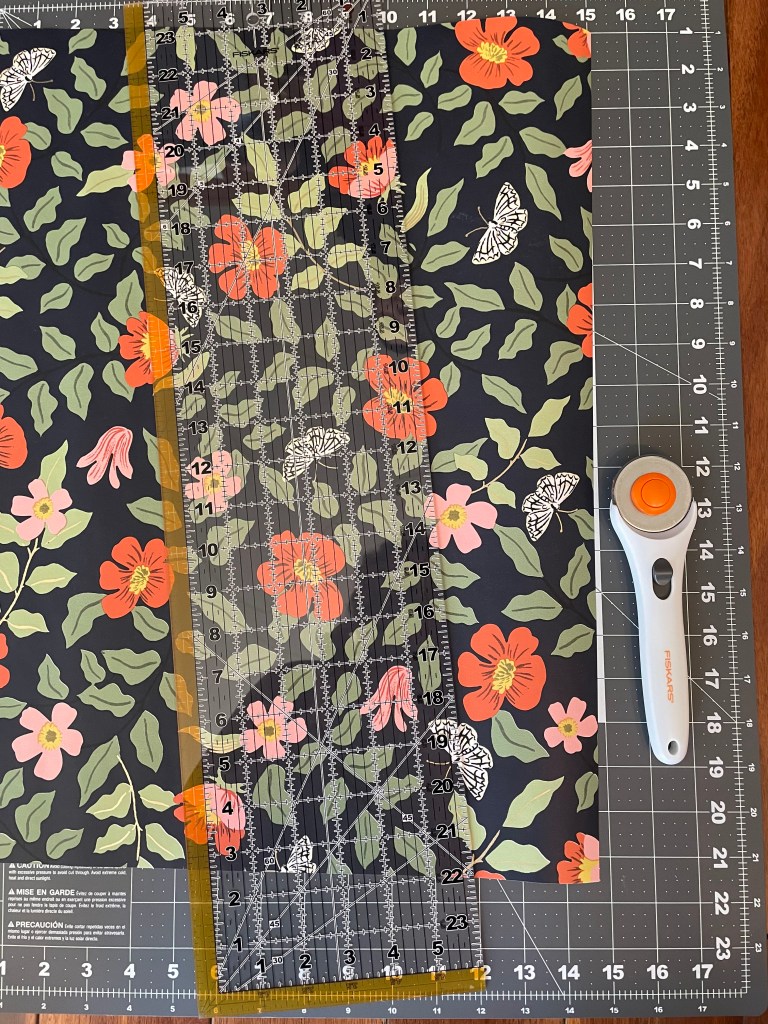
Jen loves anything Rifle Paper Co so naturally, that is where she got her wallpaper. When figuring out how much wallpaper you need, remember to keep in mind the pattern size. If the pattern size is large, you’ll need extra wallpaper to account for matching the pattern at the ceiling again once you get one strip from ceiling to floor finished. Normally, depending on where you purchase your wallpaper, a recommendation of 10% extra over your actual square footage should cover the wall space sufficiently. You’ll also need to purchase some wallpapering tools (if you don’t already have these): craft knife (ie: exacto knife), wallpaper smoothing tool, and a tape measure. Jen also has a paper cutter to help cut a straight line. You can use a ruler and a pair of scissors if you don’t have a craft paper cutter lying around.
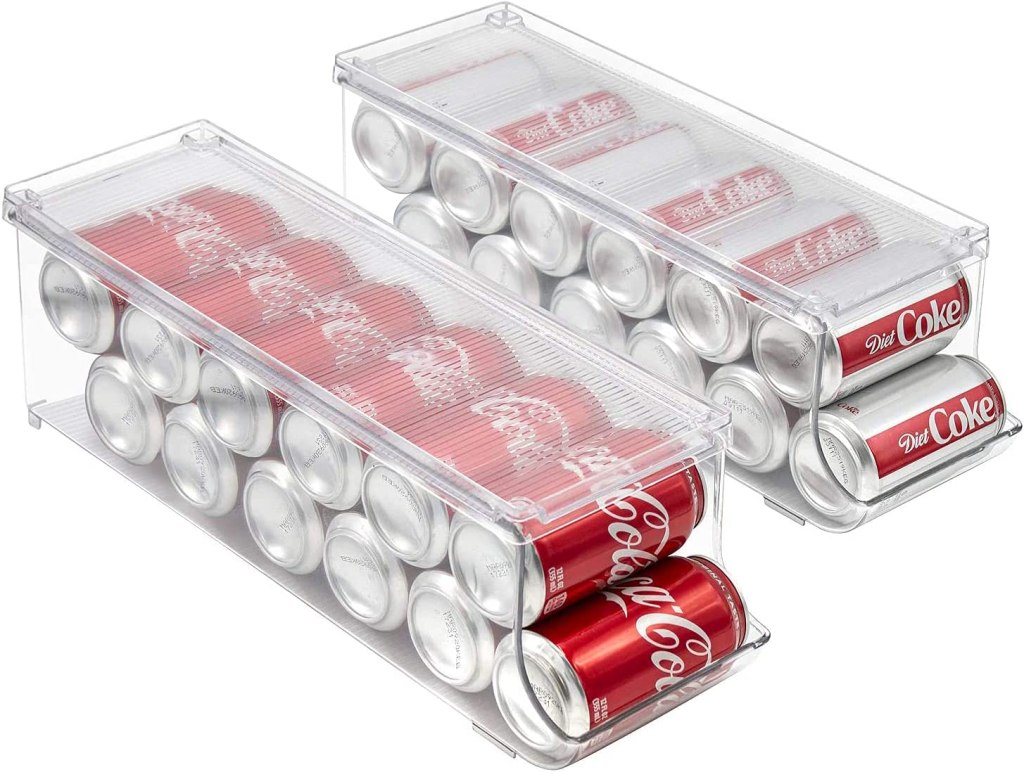
She chose budget friendly plastic & basket containers from Target (Room Essentials & Threshold brands). She also ordered some pop/soda dispensers and some shelf risers to separate the canned goods without having to stack them. Wayfair had the cutest red flower knob that we knew would go well with the wallpaper choice. As for paint choices, Jen went with Flamingo Feather by Behr paint color for the side walls to pull out the colors in the wallpaper and metallic gold spray paint for the wire shelving!


I should note that we both really loved the idea of clear containers! They were just out of reach due to the budget. If you have enough budget set aside for the clear containers go for it! We loved how the gray containers and baskets worked out in the space regardless.
#4- Paint It
The next step is to paint your space. Remove all of the shelving. Depending on how your shelving is attached, you may be able to remove the pegs that are holding up the shelving or you may not be able to. We were unable to remove Jen’s shelving pegs (dry wall pegs) due to their (they would ultimately damage the drywall to remove). Next, paint the side walls and the back wall (if you aren’t wallpapering). Jen painted the sidewalls Flamingo Feather by Behr color in a satin finish. Please allow a couple of hours after you paint to put the shelving back in.

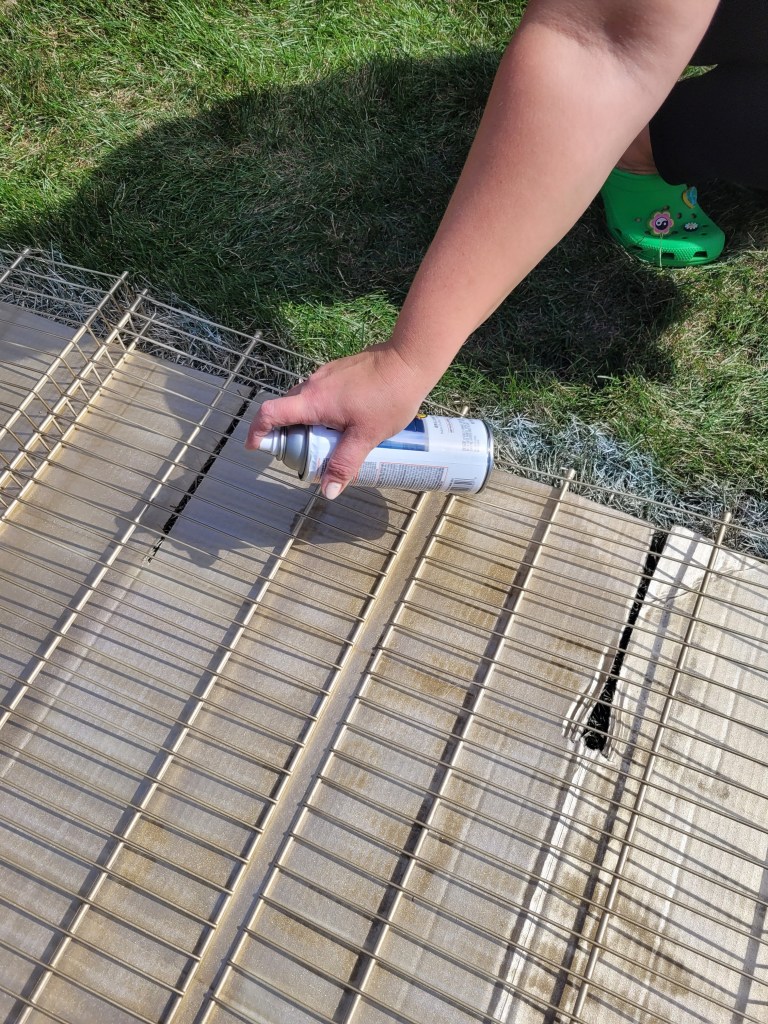
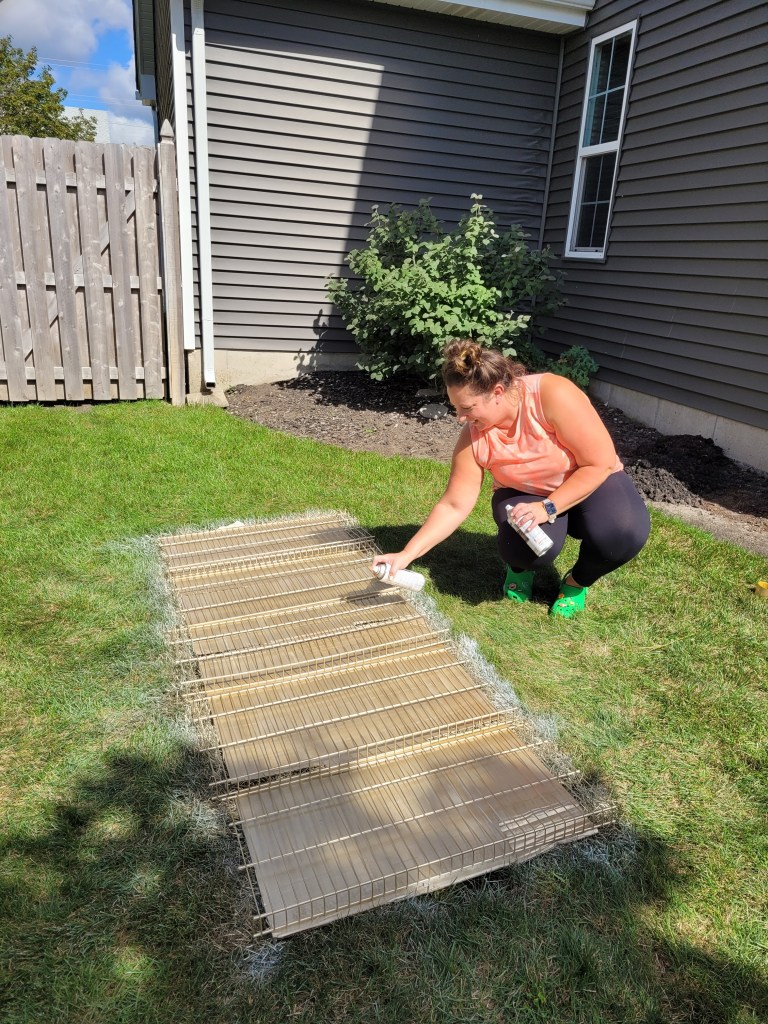
Jen wanted the pop of gold in the shelving to bring out gold highlights in the wallpaper so we painted them with spray paint. Please be sure that your wire shelving is clean (hopefully, done in the repair & clean step). We took our time to prime the shelving so the spray paint would adhere well. Then we went in with the spray paint on the top and bottoms of the shelving (follow directions on can for recoat times).
#5- Time to Wallpaper!
To start, Jen and I rolled out the wallpaper on the floor and stretched out a tape measure to the height of the wall. A large bottle of beer to hold down the end- use what you have! We added 4-5 inches as a buffer – this also helps with getting the wallpaper square to the ceiling to account for any irregularity in the wall itself. We cut the wallpaper with the craft paper cutter to ensure a straight cut and to avoid wasting any of the wallpaper.
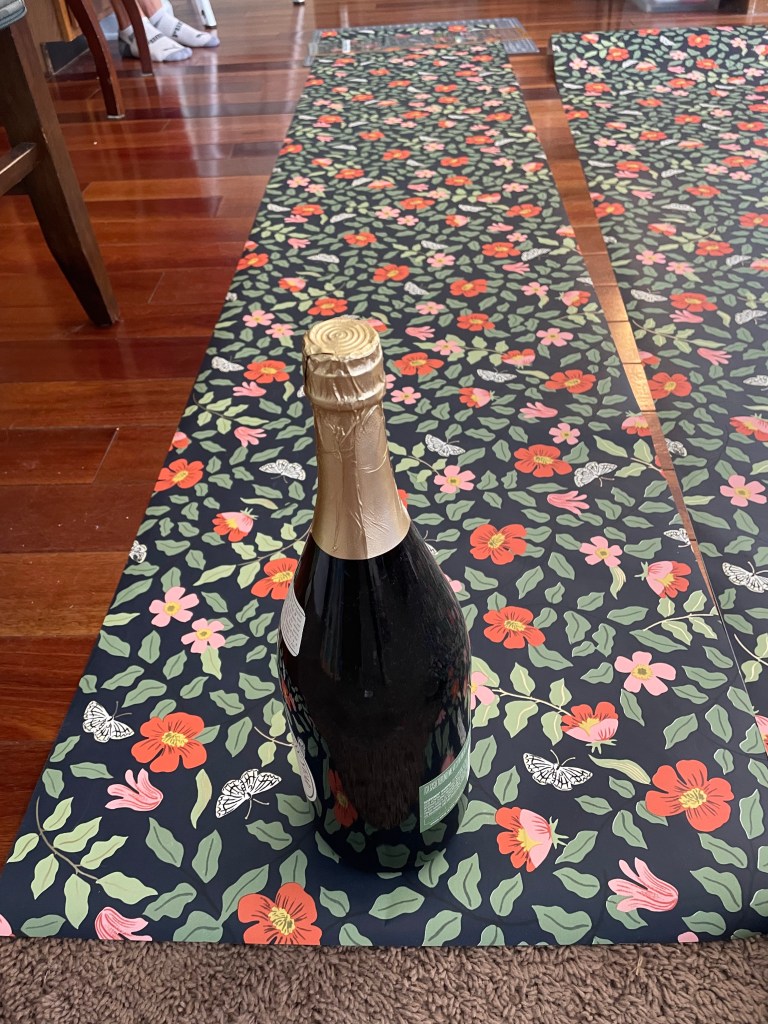
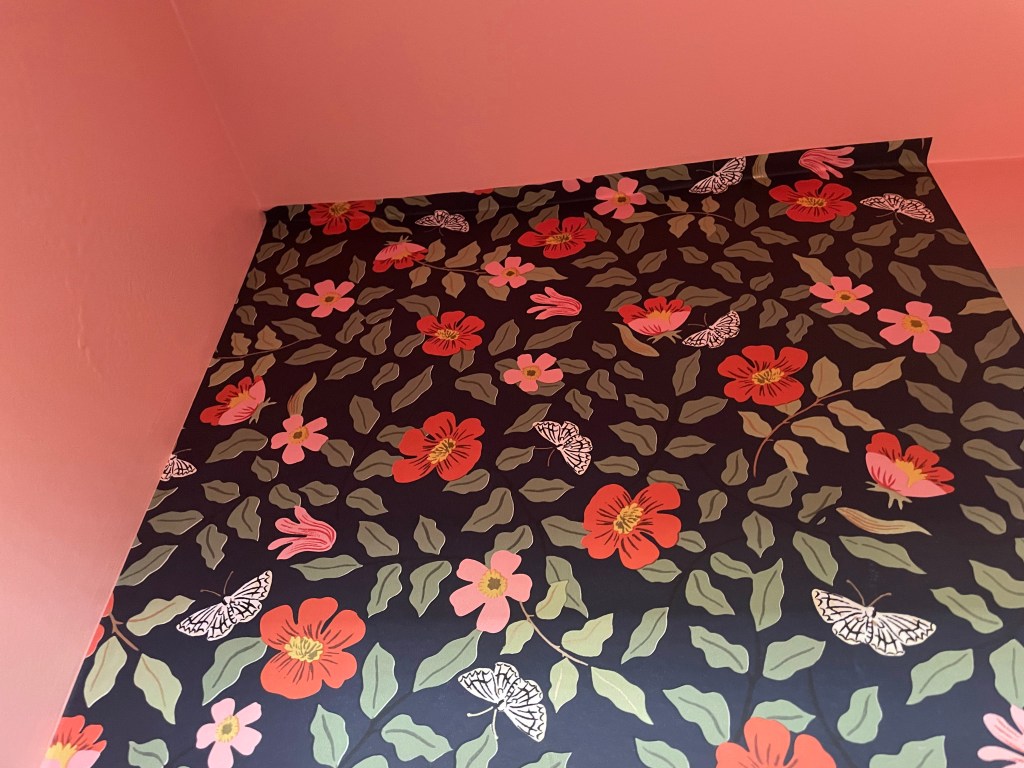
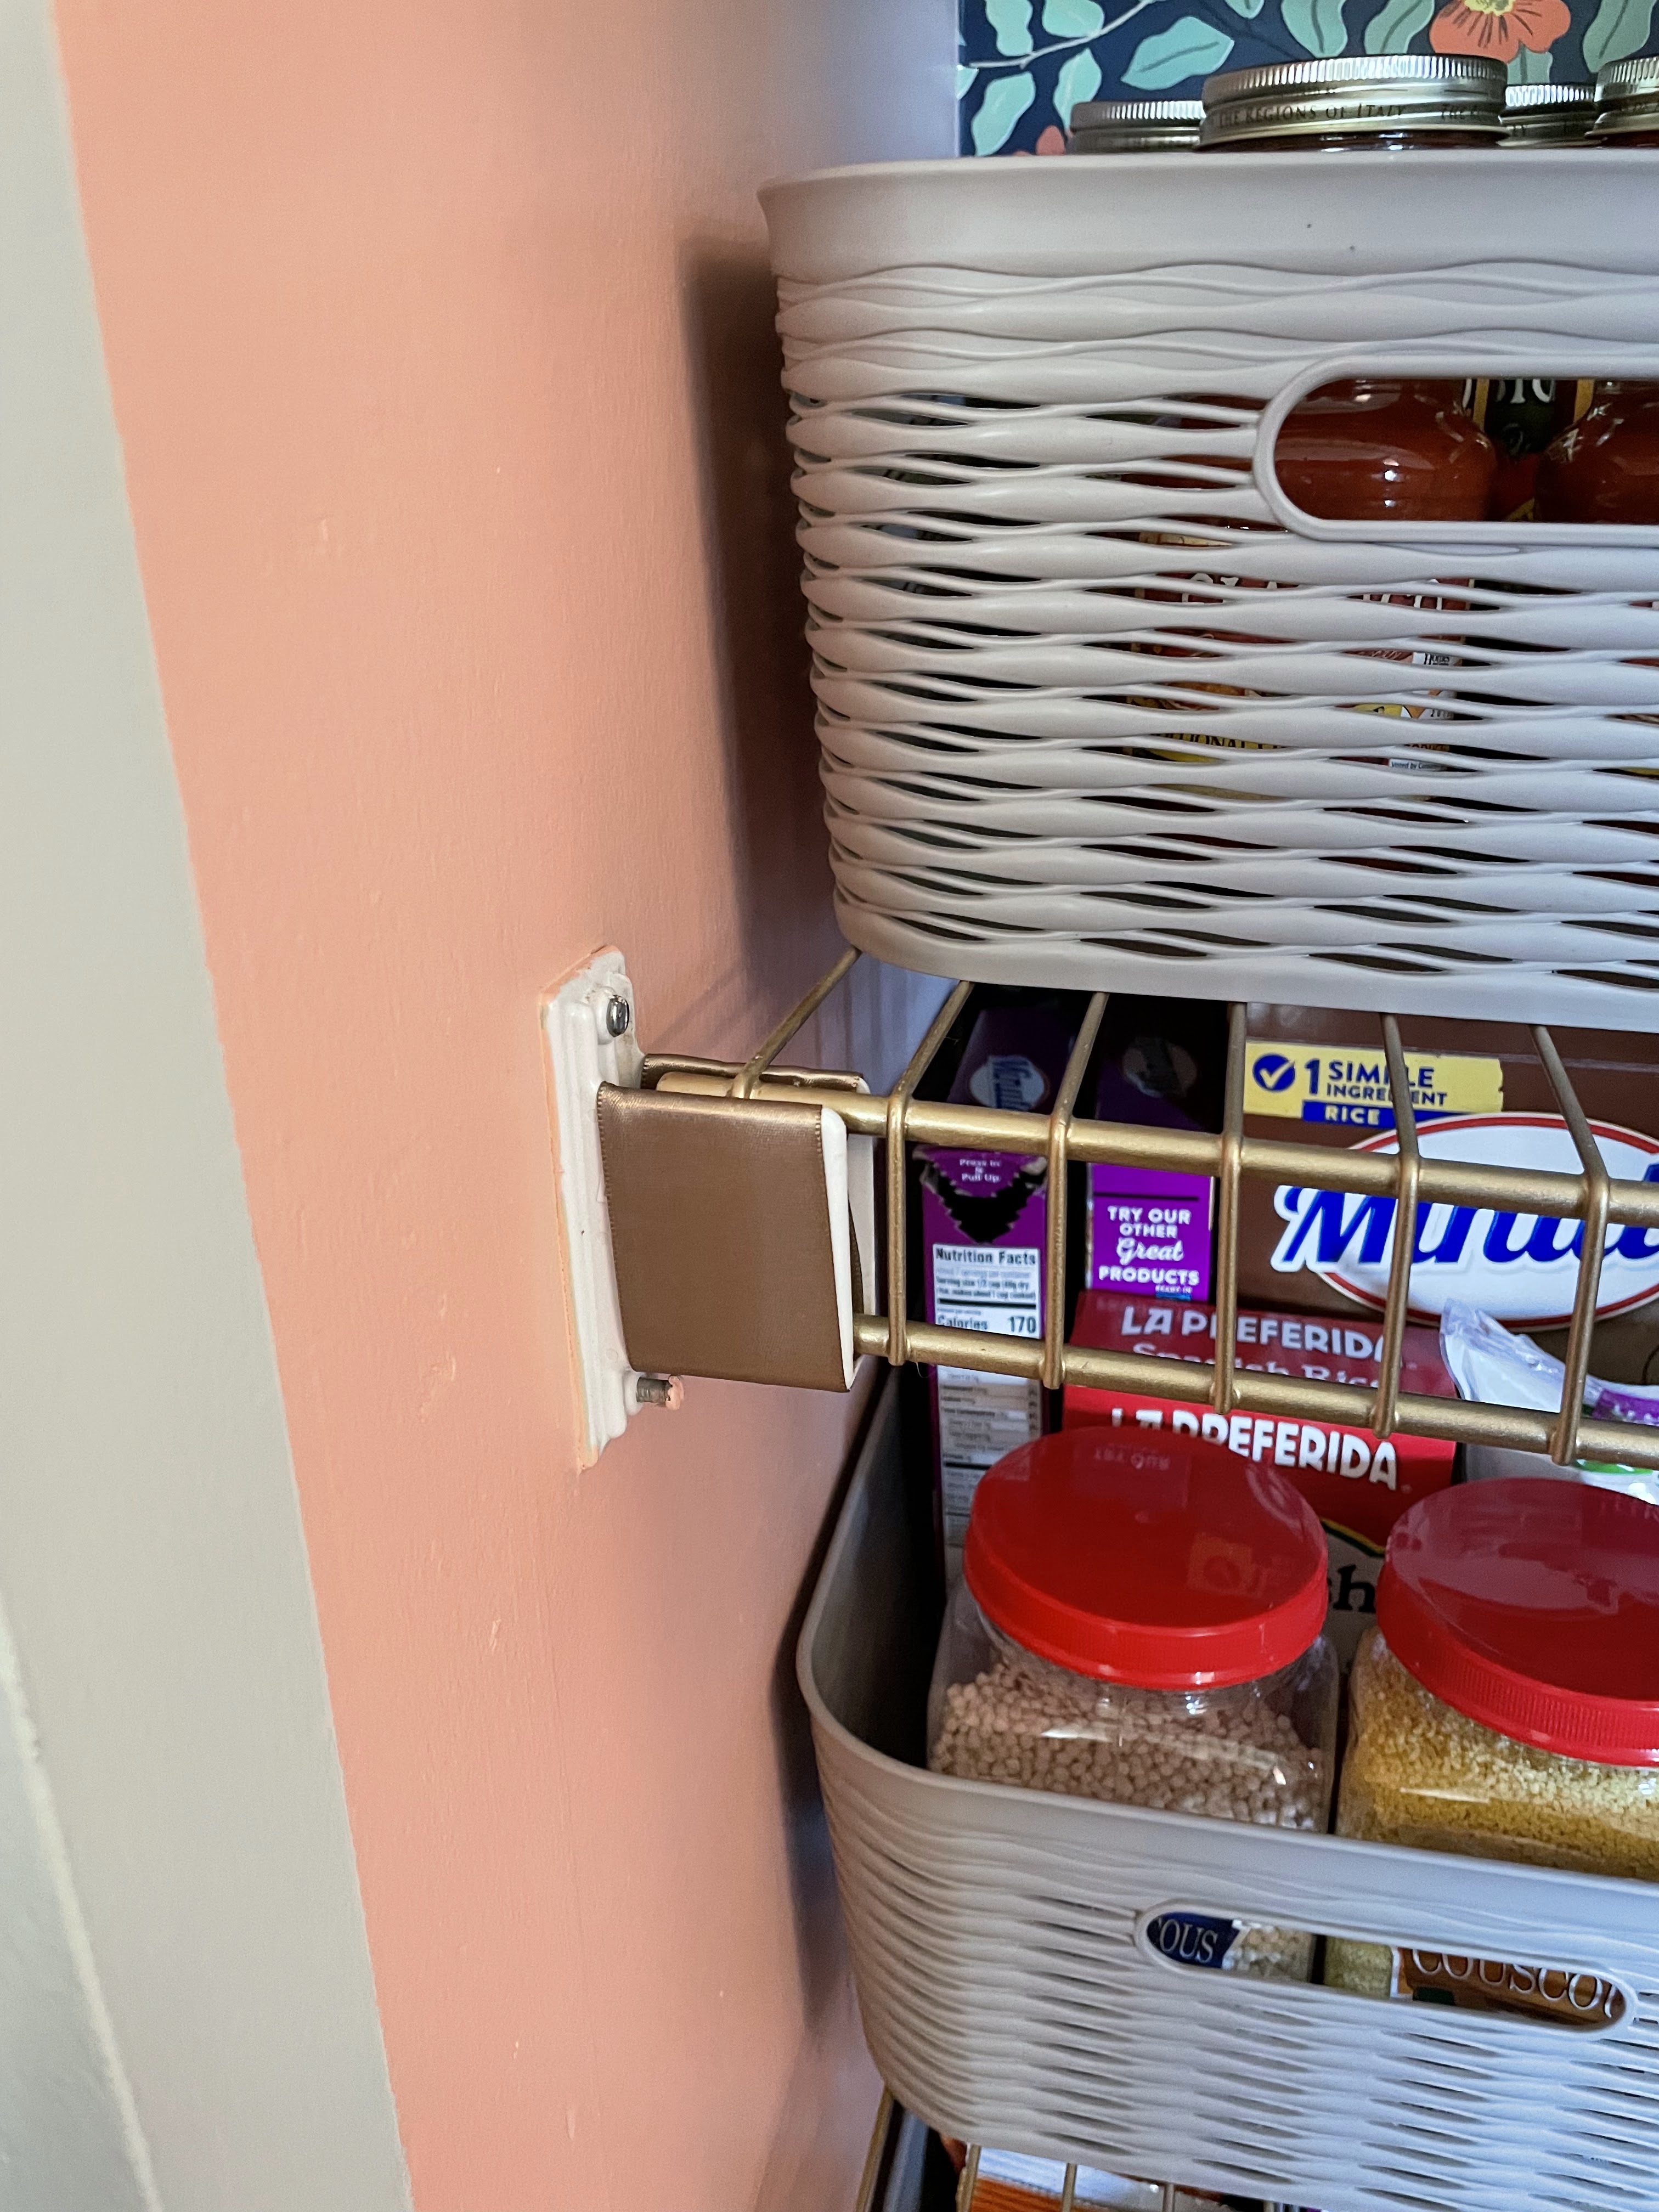
We were able to get away with one roll for the pantry wall with some to spare. The wallpaper was the peel and stick type so we were able to easily place and replace if the wallpaper wasn’t hanging correctly on the wall. We decided to keep all of the wire shelving hardware attached to the wall. We found if we had removed them it would’ve damaged the drywall so we opted to keep them in the wall to avoid having to repair all of the holes it would’ve left. Once we got down to the shelving hardware we carefully cut slits in the wallpaper with a craft knife to fit the hardware through the wallpaper. Once we had laid all of the wallpaper, we carefully cut around the hardware and smoothed down the edges. When you have all of the wallpaper up make sure to smooth down the paper by using the smoothing tool. That will help cure it to the wall and get rid of any air pockets.
#6- Finishing
We finished up the pantry by adding a colorful, flower knob to the accordion door and we also hot glued some gold ribbon on the shelving hardware since painting it wasn’t a realistic option for Jen’s pantry.
After the finishing touches were added, we put the shelves back in and sorted the food to their assigned containers and shelves! Overall, we loved how it turned out! The spray painted shelves, wallpaper and pop of fun on the knob really made this pantry. It really added that fun and personalized touch to make it Jen’s!
Do you have a pantry in need of a refresh? Will you be using some of the ideas here? Tell us about it below!
Follow us on Social Media to get in on the conversation!

Hi! My name is Kara. I am a wife and mother of two kids and two dogs! In 2017, we moved from Iowa to Illinois and following shortly after I transitioned from a full time Inside Sales Manager position to managing our new house and family home life. With both kids in school, I spend a lot of my time gardening, reading, shopping, decorating and DIYing. I love planning for home projects, holidays, and next year’s garden! I hope to share some of my projects and ideas with you!

Leave a comment